
How to Play the D9 Guitar Chord (Full Shape and an Easy Open Version)
The full D9 barre shape at the 5th fret, a genuinely easy open version with no barre at all, and how D9 differs from D7, Dadd9, and Dmaj7.

To play a D9 chord on guitar, mute the low E string, place your index finger on the 4th fret of the D string, your middle finger on the 5th fret of the A string, and lay your ring finger flat across the 5th fret of the G, B, and high E strings as a small barre. Strum from the A string down through the high E string. That gives you all five notes of a D9, D, F#, A, C, and E, in one shape. If the mini-barre is fighting you, there is also a genuinely easy open version later in this article that uses no barre at all. Everything below covers both shapes, why the barred one buzzes, and how D9 actually differs from D7, Dadd9, and Dmaj7, which get mixed up constantly.
The D9 chord, string by string
Here is the full shape as a table. "Finger" uses standard numbering: 1 is your index finger, 2 is your middle finger, 3 is your ring finger, 4 is your pinky.
| String | Fret | Finger |
|---|---|---|
| 6 (low E) | Muted, do not play | - |
| 5 (A) | 5 | 2 (middle) |
| 4 (D) | 4 | 1 (index) |
| 3 (G) | 5 | 3 (ring, mini-barre) |
| 2 (B) | 5 | 3 (ring, mini-barre) |
| 1 (high E) | 5 | 3 (ring, mini-barre) |
The ring finger's job is the part that trips people up. It is not fretting three separate notes, it is laying flat across three strings at the same fret, the same movement a full barre chord asks of your index finger, just on three strings instead of six. The middle finger and index finger each hold a single note on their own string, below and beside that mini-barre.
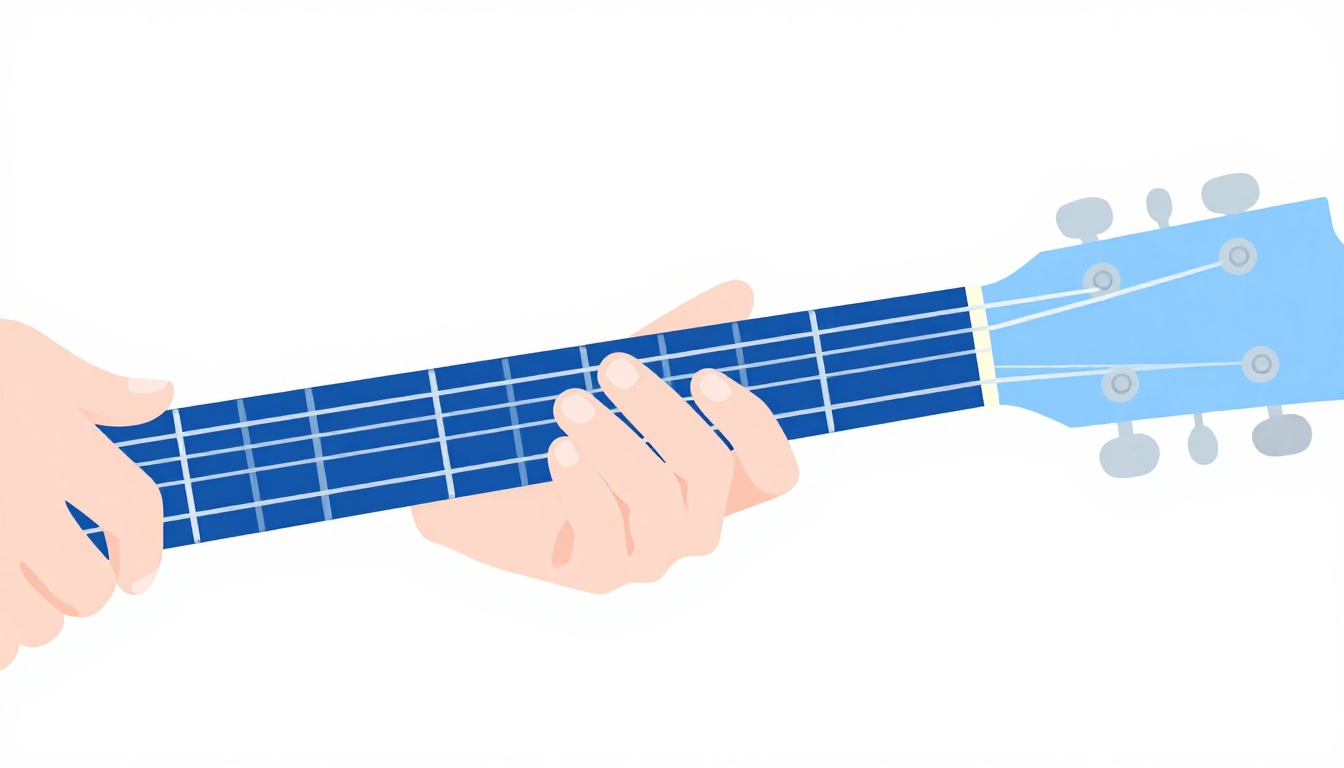
If a mini-barre with your ring finger genuinely will not settle, some players swap it for the pinky instead, keeping the ring finger free on the A string beside the middle finger for extra stability. The notes and the sound are identical either way. Which finger does the barring is a matter of which hand shape feels more stable to you, not a right or wrong choice.
What notes are in a D9 chord
A D9 chord is built from five notes: D (the root), F# (the major 3rd), A (the perfect 5th), C (the flattened 7th), and E (the 9th). That flattened 7th is what separates a 9 chord from an add9 chord, and it is also what gives D9 its restless, bluesy pull rather than the brighter, more settled sound of a plain major chord.
| Note | Role | Where it sits in the shape above |
|---|---|---|
| D | Root | 5th string, 5th fret |
| F# | Major 3rd | 4th string, 4th fret |
| A | Perfect 5th | 1st string, 5th fret |
| C | Flattened 7th | 3rd string, 5th fret |
| E | 9th | 2nd string, 5th fret |
Counting a scale past its own octave is where the "9" comes from. The D major scale runs D (1), E (2), F# (3), G (4), A (5), B (6), C# (7), then starts over at D (8). A dominant chord flattens that 7th degree, giving C natural instead of C#, and keep counting past the octave and E becomes 9, a full octave above where it sat as the 2nd note. The 9th and the 2nd are the same note, E, just thought of as continuing the stack of thirds upward rather than sitting underneath the root.
Other ways charts write this chord
Chord charts are not perfectly consistent about how they label a dominant 9, and it is worth recognizing the common variants so a different-looking symbol does not read as a different chord.
| Symbol on a chart | What it means |
|---|---|
| D9 | Standard notation for a dominant 9 chord |
| Ddom9 | The same chord, spelled out to avoid confusion with Dmaj9 |
| D7(9) | The 7th written first, with the added 9th shown in brackets |
| D79 | An older, compressed way of writing the same D7(9) |
All four of these point at the exact same five notes, D, F#, A, C, and E. The variation is purely in how different publishers or software format the symbol, not in the chord itself. What to actually watch for is "Dmaj9" or "Dadd9," both of which are genuinely different chords covered below, not alternate spellings of D9.
Listening for the 9th before you play it
Before working on the shape itself, it helps to know what you are listening for. Play an open D major chord, then a plain D7, then the full D9 shape, one after another, and pay attention to how each one feels rather than only how it sounds.
Plain D major feels settled and complete on its own. D7 introduces a slight pull, a sense that the chord wants to move somewhere rather than sit still, coming entirely from the flattened 7th. D9 keeps that same pull and adds a layer of color on top of it, a fuller, slightly denser quality that comes specifically from the 9th sitting a whole step above the octave. Many new players describe the difference between D7 and D9 as D7 sounding "bluesy" and D9 sounding "bluesy and rich" or "bluesy and busy," which is a reasonable way to hear it before the theory behind the difference clicks.
Isolating the 9th itself is worth doing once the full shape rings cleanly. Play the D string's 4th fret and the B string's 5th fret together, on their own, away from the rest of the chord. Those two notes, F# and E, are the 3rd and the 9th, and hearing that specific interval by itself makes it easier to recognize the same color the next time it shows up in a chart or a recording.
D9 vs D7, Dadd9, and Dmaj7
These four chords get confused constantly because their names look similar and a couple of them share fingers on the fretboard, but each one is built from a different set of notes.
| Chord | Notes | 7th present | 9th present | Character |
|---|---|---|---|---|
| D7 | D, F#, A, C | Flattened (C) | No | Bluesy, wants to resolve |
| D9 | D, F#, A, C, E | Flattened (C) | Yes (E) | Bluesy, richer, funkier |
| Dadd9 | D, F#, A, E | No | Yes (E) | Bright, resolved, shimmery |
| Dmaj7 | D, F#, A, C# | Major (C#) | No | Soft, jazzy, still resolved |
D9 is best understood as D7 with an E stacked on top, not as a relative of Dadd9. Dadd9 deliberately leaves the 7th out, which is exactly why guitarists write "add9" instead of a bare "9," to make clear no 7th is involved. If a chart just says "D9," it is calling for the flattened 7th and the 9th together, a genuinely different, more dominant-sounding chord than either Dadd9 or Dmaj7.
An easier version with no barre at all
Unlike a lot of open-position 9 chords, D9 has a genuinely easy version that needs no barre whatsoever, because two of its notes fall on open strings. It leaves out the major 3rd (F#), which is why it is sometimes labeled D9(no3), but the flattened 7th and the 9th, the two notes that actually define a dominant 9 sound, are both still there.
| String | Fret | Finger |
|---|---|---|
| 6 (low E) | Muted, do not play | - |
| 5 (A) | Muted, do not play | - |
| 4 (D) | Open | - |
| 3 (G) | 2 | 2 (middle) |
| 2 (B) | 1 | 1 (index) |
| 1 (high E) | Open | - |
This shape plays D (root, open), A (5th), C (flattened 7th), and E (9th, open). Losing the 3rd changes the chord's flavor slightly, it reads a little more ambiguous and a little less clearly "major" than the full barred version, but it is still unmistakably a dominant 9 sound, and it is far more forgiving for a first week on the chord.
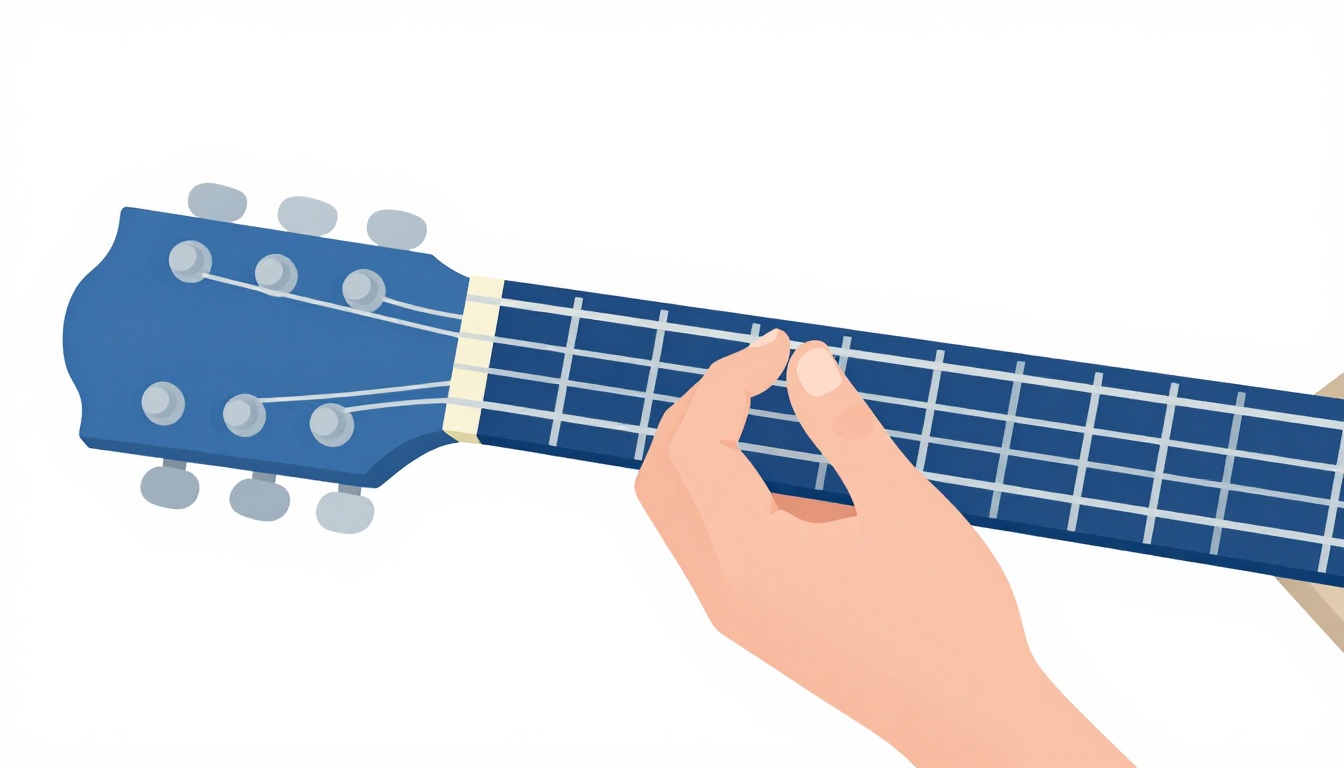
Strum only the D, G, B, and high E strings for this version, leaving both the low E and A strings out entirely. Because there is no barre and no stretch beyond a two-fret span, this is a reasonable first D9 shape to learn before tackling the full mini-barre above, and many players simply keep using it once the barred version is also comfortable, since the two are interchangeable in most musical contexts.
A rootless version for jazz comping
Jazz players frequently drop the root and the 5th from a 9 chord entirely, since a bass player or another instrument usually supplies the root, and the remaining notes still spell out the chord's essential color. On guitar this gives you a compact, no-barre D9 that needs only three fretted notes, none of them sharing a fret with a full six-string barre.
| String | Fret | Finger |
|---|---|---|
| 6 (low E) | Muted, do not play | - |
| 5 (A) | Muted, do not play | - |
| 4 (D) | 4 | 1 (index) |
| 3 (G) | 5 | 2 (middle) |
| 2 (B) | 5 | 3 (ring) |
| 1 (high E) | Muted, do not play | - |
This voicing plays only F#, C, and E, the 3rd, the flattened 7th, and the 9th. Those three notes are enough for the chord to read clearly as a dominant 9 in a band setting, since the root is implied by whatever else is playing underneath. It will sound thin played completely alone, with nothing else supplying a low D, so treat it as a comping tool for playing along with a bassist or a backing track, not a replacement for the full shape when you are the only instrument.
A movable shape further up the neck
Once either open-position shape feels comfortable, it is worth knowing the full barred version covered at the top of this article is already movable, since every fretted note in it comes from a finger rather than an open string, other than the muted low E. Slide the whole shape up or down the neck and the root moves with it.
| Chord | 6 (low E) | 5 (A) | 4 (D) | 3, 2, 1 (mini-barre) |
|---|---|---|---|---|
| C9 | Muted | 3rd fret | 2nd fret | 3rd fret |
| D9 | Muted | 5th fret | 4th fret | 5th fret |
| G9 | Muted | 10th fret | 9th fret | 10th fret |
Whatever fret your middle finger lands on the A string becomes the new root, and every other finger shifts by the same number of frets. This is the same shape covered above, just relocated, which means you do not need to learn a separate fingering for every 9 chord you meet, only where to place the one shape you already know.
There is also a distinct barre voicing further up the neck that some players prefer, with the barre itself landing on the same fret across the middle four strings and a single extra finger on top.
| String | Fret | Finger |
|---|---|---|
| 6 (low E) | Muted, do not play | - |
| 5 (A) | 7 | 1 (index, barre) |
| 4 (D) | 7 | 1 (index, barre) |
| 3 (G) | 7 | 1 (index, barre) |
| 2 (B) | 7 | 1 (index, barre) |
| 1 (high E) | 8 | 2 (middle) |
Here the root, D, lands on the G string rather than the A string, which can feel disorienting the first time you meet it, since most movable chords a new player learns put the root on the low E or A string. It is worth knowing this shape exists mainly so a chord chart or a video lesson using it does not look like a completely different chord.
D9 with a capo
A capo lets you keep the exact open-string ring of the no-barre shape covered above while shifting the whole chord to a different pitch, rather than trading it for a barre chord in an unfamiliar spot on the neck.
| Capo position | Shape you play | What it sounds like |
|---|---|---|
| 2nd fret | Open D9(no3) shape (xx0210) | E9 (no 3rd) |
| 3rd fret | Open D9(no3) shape (xx0210) | F9 (no 3rd) |
| 5th fret | Open D9(no3) shape (xx0210) | G9 (no 3rd) |
Clamp a capo across the 2nd fret and play the identical shape covered earlier in this article, and the chord ringing out is E9, not D9, because the capo raises every fretted and open note by two half steps. This matters most in the blues and funk contexts covered later in this article, where a singer or band may need a 9 chord in a key like E or G, and a capo preserves the exact fingering you already know rather than asking you to relearn anything new.
None of this changes what D9 itself is. You are moving the same shape to a different pitch, not altering the chord's internal fingering or the relationships between its notes.
D9sus4: the other common ninth chord
D9sus4 replaces the major 3rd (F#) with the 4th (G), the same substitution a plain sus4 chord makes to a plain major chord, giving a suspended, unresolved version of D9.
| Chord | Notes | Note replaced |
|---|---|---|
| D9 | D, F#, A, C, E | None, standard dominant 9 |
| D9sus4 | D, G, A, C, E | 3rd (F#) replaced by 4th (G) |
The easiest way to play it is a single, full barre, no mini-barre and no separate finger placements needed.
| String | Fret | Finger |
|---|---|---|
| 6 (low E) | Muted, do not play | - |
| 5 (A) | 5 | 1 (barre) |
| 4 (D) | 5 | 1 (barre) |
| 3 (G) | 5 | 1 (barre) |
| 2 (B) | 5 | 1 (barre) |
| 1 (high E) | Muted, do not play | - |
Lay your index finger flat across the A, D, G, and B strings at the 5th fret, mute the low E and high E strings, and strum the middle four. Because the major 3rd is gone entirely, this chord has none of D9's usual "major versus minor" identity, which is exactly what gives sus chords their open, hanging quality. Guitarists usually resolve a 9sus4 chord back to the plain 9 chord it is built from, often just by lifting the barre's grip on the D string and letting the 4th fret ring in its place, the same G-for-F# swap that separates the two chords.
How D9 relates to D11 and D13
D9 is part of a family of extended dominant chords built by continuing to stack notes a third apart on top of a basic dominant 7. D11 adds an 11th (G) on top of what D9 already has, and D13 adds a 13th (B) on top of that, though in practice guitarists usually drop one or two of the lower extensions from an 11 or 13 chord voicing, since fitting every note across six strings is not physically possible.
| Chord | Adds on top of D7 |
|---|---|
| D9 | 9th (E) |
| D11 | 9th (E) and 11th (G) |
| D13 | 9th (E), and usually the 13th (B), often without the 11th |
You will not need D11 or D13 shapes to play D9 itself, but recognizing the family helps when a chart moves between them within the same song, since a D13 chord in one bar and a D9 in the next are close relatives built by the same stacking logic, not unrelated chords that happen to share a letter name.
Which strings to strum
For the full barred shape, strum from the 5th string (A) down through the 1st string (high E), leaving the 6th string (low E) out entirely. For the no-barre open version, strum from the 4th string (D) down through the 1st string (high E), leaving both the low E and A strings out. For the rootless jazz voicing, strum or pick only the 4th, 3rd, and 2nd strings.
The reason is the same in every case: an open low E string rings at E, and while E is actually one of D9's own notes here (the 9th), striking it as a low bass note underneath the chord muddies the voicing, since a 9 chord's bottom note is meant to be its root, not a note two octaves above where the root sits. On a chord this color-dependent, an unintended low note is more noticeable than it would be on a plain major chord, since 9 chords already rely on a slightly ambiguous, tension-filled sound that a wrong-register note muddies further.
Why your D9 is buzzing or sounds dead
The mini-barre on the full shape is where nearly every problem with this chord starts. Work through these one at a time.
The mini-barre is not flat enough
If your ring finger is arched instead of flattened across the G, B, and high E strings, one or two of those three strings will buzz or go dead while the others ring fine. Roll your ring finger slightly toward its outer edge, the side away from your thumb, until all three strings ring clearly when picked one at a time.
The mini-barre is too far from the fret wire
A fret number describes the space between two metal wires, not the wire itself. Pressing closer to the fret wire nearer the guitar's body takes noticeably less force than pressing in the middle of that space. If your ring finger sits in the middle of the "5th fret" space rather than hugging the wire, you will need more pressure than the shape actually requires, and your hand will tire faster.
Uneven pressure across the barre
Because a finger is not perfectly flat along its whole length, one string under the mini-barre often gets less pressure than the others by default, usually whichever string sits closest to the fingertip or closest to the first knuckle. Pick the G, B, and high E strings one at a time while holding the chord and listen for which one is weakest, then focus added pressure specifically over that string rather than pressing harder everywhere at once.
The index or middle finger is leaning into a neighboring string
Your index finger on the D string and your middle finger on the A string are working in a tight cluster with the muted low E string right next to the middle finger. If either finger leans or flattens more than it needs to, it can mute a string it is not supposed to touch. Curl both fingers so they contact their string near the fingertip, coming down close to vertical rather than at a shallow angle.
The low E string is sneaking into the strum
This is not a fretting problem, it is a strumming habit, and it is covered in the strumming section above. If every note in the chord rings clean when picked individually but the strummed chord sounds muddy or bass-heavy, the low E string getting struck by accident is the most likely cause, not anything in your left hand.
The thumb is creeping over the top of the neck
A thumb that climbs up and over the top of the neck pulls the rest of your hand down flatter to compensate, which works directly against the vertical finger angle the mini-barre needs. Keep your thumb roughly behind your middle finger, on the back of the neck, rather than hooking over the top.
The guitar itself is working against you
If every other cause has been ruled out and the mini-barre still buzzes no matter how it is placed, the instrument's setup may be part of the problem rather than technique. Strings sitting unusually high above the frets, a common issue on guitars that have not been set up in a while, ask for noticeably more finger pressure on any barre than a well-adjusted guitar would need. This is worth ruling out on an older or unfamiliar instrument before assuming the fault is entirely in your hand.
Changing from D9 to D7
The no-barre open version of D9 and the standard open D7 chord share three fingers in the exact same spots, which makes this one of the smoothest changes on this list once you know where to look.
| Chord | 6 (low E) | 5 (A) | 4 (D) | 3 (G) | 2 (B) | 1 (high E) |
|---|---|---|---|---|---|---|
| D9 (no3, open) | Muted | Muted | Open | 2 (middle) | 1 (index) | Open |
| D7 (open) | Muted | Muted | Open | 2 (middle) | 1 (index) | 2 (ring or pinky) |
The only difference between these two shapes is the high E string. D9 leaves it open for the 9th, D7 frets it at the 2nd fret for the major 3rd. Practicing just that one finger, adding or lifting it off the high E string while the rest of the hand stays completely still, is the fastest way to move between these two chords cleanly.
Changing from D9 to G
D9 leans heavily on the V chord in the key of G, and plain G major is the most common destination from it, the sound of a dominant chord finally resolving to the key it belongs to.
| Chord | 6 (low E) | 5 (A) | 4 (D) | 3 (G) | 2 (B) | 1 (high E) |
|---|---|---|---|---|---|---|
| D9 (full barre) | Muted | 5 (middle) | 4 (index) | 5 (ring, barre) | 5 (ring, barre) | 5 (ring, barre) |
| G (open) | 3 (ring) | 2 (index) | Open | Open | Open | 3 (pinky or ring) |
There is no shared finger position here, so this change relies on releasing the entire D9 shape as one motion and dropping the open G shape as a separate, complete motion, rather than trying to walk fingers from one chord into the next. Practicing the release and the new shape as two distinct, deliberate movements, slowly at first, is what eventually makes the change feel instant.
Changing from D9 to G9
Staying inside the same family of 9 chords is often smoother than jumping to a plain triad, since your hand keeps the same general shape and only shifts position.
| Chord | 6 (low E) | 5 (A) | 4 (D) | 3, 2, 1 (mini-barre) |
|---|---|---|---|---|
| D9 | Muted | 5 (middle) | 4 (index) | 5th fret |
| G9 | Muted | 10 (middle) | 9 (index) | 10th fret |
Because this is the same movable shape covered earlier, just relocated five frets higher, your hand does not need to learn a new grip, only a new position on the neck. Sliding the entire shape as one block, keeping the fingers in their same relative spots, is far more reliable than trying to reposition each finger independently mid-slide.
D9 in a 12-bar blues turnaround
Dominant 9 chords are a common substitute for plain dominant 7 chords in blues, since the extra note thickens the sound without changing which chord is functioning as the I, IV, or V. D9 shows up constantly in exactly this role, most often as the V chord in the key of G, one of the most common keys for blues, country, and folk guitar. A typical 12-bar blues in the key of G, played with 9 chords instead of plain 7s, uses G9 as the I chord, C9 as the IV chord, and D9 as the V chord.
| Bar | Chord | Roman numeral |
|---|---|---|
| 1 to 4 | G9 | I9 |
| 5 to 6 | C9 | IV9 |
| 7 to 8 | G9 | I9 |
| 9 | D9 | V9 |
| 10 | C9 | IV9 |
| 11 to 12 | G9 | I9, then turnaround |
This substitution works because a 9 chord shares its root, 3rd, 5th, and flattened 7th with the plain dominant 7 chord it is replacing, adding only the 9th on top. The underlying blues form and its resolution points do not change, only the color and thickness of each chord, and D9 landing on bar 9 is exactly where a listener's ear expects the harmony to lift and push back toward home.
A common variation on this same form is the "quick change" blues, which moves to the IV chord in the second bar instead of staying on the I chord for the first four bars.
| Bar | Standard turnaround | Quick change |
|---|---|---|
| 1 | G9 | G9 |
| 2 | G9 | C9 |
| 3 to 4 | G9 | G9 |
Everything else in the form stays the same. The quick change simply adds one extra bar of movement near the start, which is common enough in real blues playing that it is worth recognizing by ear rather than assuming a bandleader has made a mistake the first time you hear it.
Strumming D9 in a shuffle feel
Slow blues in this style is usually felt in a shuffle rhythm, where each beat splits unevenly into a long note followed by a short one rather than two even eighth notes. Rather than strumming the full D9 chord on every one of those subdivisions, many players hold the shape and let the shuffle come from a steady down-up picking motion low on the strings, brushing lightly on the upstroke and digging in slightly more on the downstroke.
Practicing the shuffle feel separately from the chord itself, tapping or clapping the long-short pattern until it feels natural, before adding the D9 shape on top, keeps the two skills from competing for your attention at the same time. Once the feel is steady, the chord change at bar 9 above lands on the strong beat of the shuffle, which is where a listener's ear expects the harmony to move.
D9 in a jazz ii-V-I progression
In jazz harmony, a dominant 9 chord frequently fills the V slot of a ii-V-I progression, the three-chord movement that resolves a huge share of jazz standards back to their home key. In the key of G major, that progression runs Am7 (ii), D9 (V), Gmaj7 (I).
| Chord | Roman numeral | Notes |
|---|---|---|
| Am7 | ii | A, C, E, G |
| D9 | V | D, F#, A, C, E |
| Gmaj7 | I | G, B, D, F# |
Notice that D9 shares its A and C with the Am7 chord just before it, and its D and F# with the Gmaj7 chord just after it, which is exactly why the progression sounds so smooth even though the chord names look unrelated on paper. Practicing this three-chord move on its own, slowly, is one of the more useful things a guitarist learning D9 can do with it, since the shape shows up constantly in jazz, soul, and pop songs built around this same resolution.
Reading slash chords like D9/F# or D9/C
A slash chord tells you which note to put in the bass, separate from the chord itself. D9/F# means play a D9 chord, whatever voicing you choose, but make sure an F#, the chord's major 3rd, is the lowest note sounding. D9/C does the same with the flattened 7th in the bass instead.
| Chord symbol | Chord | Bass note | What that note is in the chord |
|---|---|---|---|
| D9 | D9 | D | Root |
| D9/F# | D9 | F# | Major 3rd |
| D9/C | D9 | C | Flattened 7th |
On guitar, the easiest way to satisfy a slash chord is often to fret the bass note on the low E or A string, then add whatever portion of the chord's upper notes is comfortable above it, rather than trying to force a single fixed shape to cover both requirements at once. If a chart hands you a slash chord you have not met before, start by finding just the bass note and confirming it against the table above, since the letter after the slash is always a plain note name, never a second chord.
D9 in funk rhythm guitar
Dominant 9 chords, D9 among them, are a genuine staple of funk rhythm guitar, most often played in short, muted, percussive strokes rather than held and let ring. A common funk-style movement shifts between a 9 chord and the 13th chord built on the same root, keeping the hand in roughly the same position while adding motion.
The technique that makes this style work is as much about the right hand as the left: strum, mute the strings immediately with the side of your fretting hand or the heel of your picking hand, strum again, mute again, building a tight, syncopated pattern rather than a sustained chord. A common starting pattern counts in straight sixteenth notes, striking the chord on the first and third sixteenth of each beat and choking the strings silent on the second and fourth, so the rhythm reads as a clipped, percussive pulse rather than a sustained wash of sound.
Practicing the D9 shape purely as a muted, percussive stroke, with no sustain at all, is a useful exercise on its own before trying to combine it with a full song. Once the muted stroke feels steady on its own, try letting one strum in every four ring out fully while the rest stay clipped, which is closer to how the pattern actually gets used against a full band.
Fingerpicking a D9 chord
The D9 shape also works picked one string at a time rather than strummed, which is a useful way to hear all five of its notes individually before combining them into a full chord.
| Finger | String | Note |
|---|---|---|
| Thumb | 5 (A) | D |
| Index | 4 (D) | F# |
| Middle | 3 (G) | C |
| Ring | 2 (B) | E |
A simple pattern: thumb plays the A string, then index, middle, and ring pluck the D, G, and B strings in sequence, letting the high E ring as part of the chord's overall color rather than a note in the pattern itself. Practicing this slowly, naming each note out loud as it plays, is a good way to actually hear the flattened 7th and the 9th separately rather than only hearing them blend into the chord as a whole.
Where D9 sits in a key
D9 functions as a dominant chord, which means it wants to resolve, most naturally to a G chord. Treated as a I chord in a blues sense, D9 can also sit as the tonic of its own dominant-flavored blues in the key of D, the version covered earlier in the C9 sibling article on this site. In the key of G major, D9 sits as the V chord resolving to G itself.
| Chord | Roman numeral (in G major) |
|---|---|
| G | I |
| Am | ii |
| Bm | iii |
| C | IV |
| D / D9 | V |
| Em | vi |
Recognizing D9 as a V chord in the key of G, rather than as a chord centered on itself, explains why it so rarely sits as a song's final chord. A dominant chord's whole function is forward motion toward home, not resting as home itself, and the 9th only adds to that pull rather than resolving it.
Common mistakes beyond buzzing
A handful of habits show up again and again with this chord specifically, separate from the fretting issues already covered.
Confusing D9 with Dadd9 on a chart
As covered earlier, these are different chords, one with a flattened 7th baked in and one without. If a chart calls for D9 and you play Dadd9, or the reverse, the chord will sound noticeably different even though your fingers landed confidently. When a chart just says "9" with no "add" in front of it, it means the 7th is included.
Letting the chord ring when the style calls for muting
Especially in funk contexts, holding a D9 fully open when the part calls for short, muted strokes changes the entire feel of the rhythm part, not just its tone. If a groove sounds "right" harmonically but "wrong" rhythmically, check whether the part actually wants the strings choked off between strums rather than left ringing.
Treating the rootless voicing as a complete chord when playing alone
The rootless jazz version covered earlier sounds thin without a bass note underneath it. It is a real, useful voicing in a band setting, not a mistake to avoid, but using it as your only chord while playing solo will leave the harmony sounding incomplete, since nothing in the room is supplying the root it deliberately leaves out.
Assuming the open no-barre shape is a lesser version
The no-barre shape covered earlier is a genuine, complete-enough D9, not a training-wheels simplification to abandon the moment the full barre feels comfortable. Losing the 3rd changes the chord's flavor slightly but keeps its defining tension intact, and plenty of recordings use exactly this kind of leaner voicing on purpose.
Does D9 feel different on electric, acoustic, or nylon-string guitar?
Yes, mainly because of string tension and neck width rather than anything about the chord itself. Electric guitars typically carry lighter gauge strings under lower tension, so the mini-barre needed for the full D9 shape usually takes less force to ring cleanly than the same shape on a steel-string acoustic. Electric necks also tend to be narrower, which can make the tight cluster of index and middle fingers near the muted low E string feel more cramped rather than less, since there is simply less room between strings.
A nylon-string classical guitar pulls in the opposite direction on both counts. Nylon strings sit under noticeably lower tension than steel, so once your ring finger is correctly flattened, less force is needed to stop the mini-barre from buzzing, which helps while your fingertips are still building calluses. Classical necks are also usually wider than a steel-string acoustic's, giving the G, B, and high E strings more room to ring clearly without a neighboring finger brushing them, but that same width asks for a slightly bigger stretch between your index and middle fingers to reach their notes.
Because funk and blues, the two styles where D9 shows up most, are both played on electric guitar constantly, it is worth expecting the shape to feel different, generally easier under the fretting hand, on an electric instrument than on either an acoustic or a nylon-string guitar, rather than assuming something is wrong with your technique if one of them feels stiffer than another.
Warm-ups that make the mini-barre easier
The mini-barre is the one part of the full D9 shape that benefits most from a short warm-up before a focused session.
- Three-string press. Lay your ring finger flat across the top three strings at any comfortable fret, without the rest of the chord, and press down until all three ring cleanly when picked one at a time. Release and repeat five times.
- Barre roll. With the same three-string barre held, slowly roll your finger toward its outer edge and back toward the pad, listening for the point where all three strings ring most clearly. This builds a physical sense of exactly where your finger needs to sit.
- Finger independence. Rest your index and middle fingers on the D and A strings as they sit in the full D9 shape, then bring the ring finger down to complete the mini-barre without letting the first two fingers shift position. This is the coordination the full chord actually asks for.
None of this needs more than a minute or two, and it pays off directly the first time you try to land the full shape cleanly rather than needing several attempts.
Changing between chords is still the real skill
Every voicing and every chord change above eventually comes back to the same point: the D9 shape itself is not the hard part once the mini-barre settles in, and the no-barre version removes even that obstacle. What takes practice is landing a shape cleanly at tempo, inside a blues turnaround or a funk groove, without your hand hesitating or the rhythm dropping out while your fingers find their spot. Treat each chord change above as its own small drill, done slowly and away from a full strum or a full groove, before asking it to survive inside real playing at speed.
A practice routine for today
Fifteen focused minutes is enough to make real progress on this chord, in keeping with the idea behind practicing guitar in short daily sessions rather than occasional long ones.
- Two minutes: form the no-barre open D9 shape from nothing, five separate times, resetting your hand fully between each one. Check finger placement first, sound second.
- Three minutes: once that feels steady, move to the full barred shape and strum it slowly, five strings only. Pick the G, B, and high E strings one at a time if anything sounds muted, using the troubleshooting section above to diagnose it.
- Five minutes: practice one chord change, D9 to D7 first since the open versions share the most fingers, or D9 to G once that feels solid. Change on a slow, steady four-count, no strumming in between, just the new shape landing cleanly on the beat.
- Five minutes: loop the 12-bar blues turnaround above at a slow tempo, G9 to C9 to D9 and back, focusing only on landing each shape cleanly rather than on speed.
Repeat this most days rather than saving it for one long weekly session. The mini-barre is a physical position your hand is learning, not a fact to memorize, and it responds to frequent short repetition far better than occasional long ones.
FAQ
What notes are in a D9 chord? D, F#, A, C, and E. D is the root, F# is the major 3rd, A is the perfect 5th, C is the flattened 7th, and E is the 9th, the note stacked on top that gives the chord its fuller, jazzier color.
Is D9 the same as Dadd9? No. D9 includes a flattened 7th (C) alongside the 9th, giving it a bluesy, dominant quality. Dadd9 skips the 7th entirely, keeping the bright, resolved character of plain D major while adding only the 9th.
Is there an easy way to play D9 without a barre? Yes. The no-barre version covered above uses the shape xx0210, playing only the D, G, B, and high E strings, and it is a complete, real D9 sound, missing only the major 3rd, not a simplification that changes the chord's basic identity.
Is D9 harder to play than D7? The full barred D9 is slightly harder than open D7, mainly because of the three-string mini-barre. The no-barre D9 version, on the other hand, is about as easy as D7 itself, and the two share three finger positions in common.
Why does a chart just say "D9" instead of "Dadd9"? Because they are different chords. "D9" always includes the flattened 7th along with the 9th. Writers use "add9" specifically to signal that the 7th is left out, so the two names are never meant to be interchangeable.
Where does D9 show up most in real playing? Blues turnarounds, especially as the V chord in the key of G, and funk rhythm guitar, where 9 chords are a genuine staple, usually played as short, muted, percussive strokes rather than sustained chords.
Can I play D9 without a barre at all? Yes, using either the open no-barre shape or the rootless jazz voicing covered above. The rootless version needs only three fretted notes on the D, G, and B strings but sounds thin without a bass note underneath, so it works best in a band setting rather than as a standalone chord.
Is D9 always a V chord? Not always. Treated as a I chord in the key of D, it functions as the tonic of a dominant-flavored blues. Treated as a V chord in the key of G, it pulls strongly toward resolving down to G. Which role it is playing depends on the surrounding progression, not on anything inherent to the shape itself.
What is the difference between D9 and D9sus4? D9sus4 replaces the major 3rd with the 4th, removing the chord's major quality entirely and giving it an open, unresolved sound. It is also easier to play, since it uses a single full barre across four strings rather than the mixed mini-barre and separate finger placements the full D9 needs.
Is D9 a good chord for a beginner to learn? The full barred version is more demanding than a first-month open chord like D or G, mainly because of the mini-barre, but the no-barre open version covered above is well within reach much earlier. Starting with that easier shape, then building up to the full mini-barre once basic open chords feel comfortable, is a reasonable path rather than tackling the barre cold.
GuitarLowKey
Ready for fifteen focused minutes?
Open the web app and train the change that is blocking your song.