
I Will Follow You Into The Dark Guitar Chords
The Am, C, F, G, E and Fm chords for Death Cab for Cutie's 'I Will Follow You Into The Dark,' the capo-5 setup, the picking pattern, and why Fm keeps buzzing.

"I Will Follow You Into The Dark" by Death Cab for Cutie is played with a capo on the 5th fret, using the open chord shapes Am, C, F, G, E and Fm, plus three slash-chord variations: G/B, C/G and Am/E. There's no barre chord required if you skip Fm's full form, and the whole song is picked, not strummed, with a thumb doing the bass notes while your fingers handle the top strings. This post covers every shape in a table, the picking pattern, the full intro, verse and chorus in order, why Fm keeps buzzing, and how to play the whole thing without a capo if you don't own one.
I Will Follow You Into The Dark at a Glance
| Detail | Value |
|---|---|
| Written and performed by | Ben Gibbard, solo acoustic |
| Band | Death Cab for Cutie |
| Album | Plans (2005) |
| Capo | 5th fret |
| Shapes used (with capo) | Am, C, F, G, E, Fm, G/B, C/G, Am/E |
| Sounding key (no capo) | D minor, relative to F major |
| Technique | Fingerpicking, thumb on bass notes |
| Time feel | Slow, roughly 80 beats per minute |
Everything in that table gets its own section below.
Why There's a Capo, and What Key This Song Is Really In
Ben Gibbard plays this song with a capo clamped on the 5th fret, fretting Am, C, F, G, E and Fm shapes underneath it. A capo shortens the strings and raises whatever you play above it by one semitone per fret, so every chord shape you form still feels like Am or C under your fingers, but the pitch that comes out is five semitones higher. Play an Am shape with a capo on the 5th fret and the note leaving the guitar is a D minor chord, not A minor. Do the same with C and you get F. That's why, if you look this song up on a site that lists chords without a capo, you'll see Dm, F, Bb, C, A and Bbm instead, the exact same song, transposed up, played as barre chords with no capo at all.
Both versions are correct. The capo version is far easier on the hands, since Am, C, F, G and E are shapes most players already know, and only Fm asks for a barre. The no-capo version keeps everything as a full barre or partial barre chord, which is harder work for the fretting hand and gives you nothing back in return, since the song sounds identical either way once it's in tune. Unless you have a specific reason to avoid a capo, put one on the 5th fret and use the shapes in this post. For more on how a capo changes what you're playing more generally, see the full guitar capo chart.
The Am Chord
Am opens the song and is the chord almost every phrase in it keeps returning to.
| String | Fret | Finger |
|---|---|---|
| 6 (low E) | Muted | - |
| 5 (A) | Open | - |
| 4 (D) | 2 | 2 (middle) |
| 3 (G) | 2 | 3 (ring) |
| 2 (B) | 1 | 1 (index) |
| 1 (high E) | Open | - |
Index finger on the 2nd string (B) at the 1st fret, middle finger on the 4th string (D) at the 2nd fret, ring finger on the 3rd string (G) at the 2nd fret. The 5th string (A) rings open as the root and the 1st string (high E) rings open on top, and the 6th string is muted or simply left out of the picking pattern. With the capo on the 5th fret, this shape sounds as D minor, which is the chord this song actually resolves to more than any other.
The C Chord
C is the shape the intro and verse lean on second most, usually reached from Am.
| String | Fret | Finger |
|---|---|---|
| 6 (low E) | Muted | - |
| 5 (A) | 3 | 3 (ring) |
| 4 (D) | 2 | 2 (middle) |
| 3 (G) | Open | - |
| 2 (B) | 1 | 1 (index) |
| 1 (high E) | Open | - |
Ring finger on the 5th string (A) at the 3rd fret, middle finger on the 4th string (D) at the 2nd fret, index finger on the 2nd string (B) at the 1st fret. Leave the 3rd string (G) and 1st string (high E) open, and mute or skip the 6th string. Moving from Am to C only asks the ring finger to shift up one string and one fret while the index and middle fingers barely move, which is a big part of why this pairing sits comfortably under a picking pattern. For a deeper breakdown of this shape on its own, see the full C chord guide.
The F Chord
F is the first shape in the song that needs a barre, and it sits right before the trickiest change in the whole arrangement.
| String | Fret | Finger |
|---|---|---|
| 6 (low E) | 1 | 1 (barre) |
| 5 (A) | 3 | 3 (ring) |
| 4 (D) | 3 | 4 (pinky) |
| 3 (G) | 2 | 2 (middle) |
| 2 (B) | 1 | 1 (barre) |
| 1 (high E) | 1 | 1 (barre) |
Lay your index finger flat across the 1st fret, covering the 6th, 2nd and 1st strings at once, then add your ring finger on the 5th string (A) at the 3rd fret, pinky on the 4th string (D) at the 3rd fret, and middle finger on the 3rd string (G) at the 2nd fret. If the full barre isn't there yet, a smaller version that only frets the top four strings (muting the 6th and 5th) still gives you the correct chord and is a legitimate way to play this song while your barre strength develops.
The G Chord
G shows up at the end of most intro and chorus phrases, usually as the chord right before the progression loops back to Am.
| Chord | 6 | 5 | 4 | 3 | 2 | 1 |
|---|---|---|---|---|---|---|
| G | 3 | 2 | 0 | 0 | 0 | 3 |
Middle finger on the 6th string (low E) at the 3rd fret, index finger on the 5th string (A) at the 2nd fret, ring finger on the 1st string (high E) at the 3rd fret, with the 4th, 3rd and 2nd strings ringing open. This is the standard open G shape used across most beginner material, no variation needed here.
The E Chord
E appears briefly in the chorus, one of only two major chords in the song that aren't built on the C-shape or Am-shape family.
| String | Fret | Finger |
|---|---|---|
| 6 (low E) | Open | - |
| 5 (A) | 2 | 2 (middle) |
| 4 (D) | 2 | 3 (ring) |
| 3 (G) | 1 | 1 (index) |
| 2 (B) | Open | - |
| 1 (high E) | Open | - |
Index finger on the 3rd string (G) at the 1st fret, middle finger on the 5th string (A) at the 2nd fret, ring finger on the 4th string (D) at the 2nd fret, with the 6th, 2nd and 1st strings all ringing open. All six strings are part of this chord, which makes it the fullest-sounding shape in the song, and it's also the one chord in the progression that isn't part of the Am or C family, which is covered in more detail further down.
The Fm Chord
Fm is the chord most players get stuck on, and it shows up right after F, which makes the change unusually exposed.
| String | Fret | Finger |
|---|---|---|
| 6 (low E) | 1 | 1 (barre) |
| 5 (A) | 3 | 3 (ring) |
| 4 (D) | 3 | 4 (pinky) |
| 3 (G) | 1 | 1 (barre) |
| 2 (B) | 1 | 1 (barre) |
| 1 (high E) | 1 | 1 (barre) |
Compare this table to the F chord above and there's only one difference: the 3rd string (G), which is fretted at the 2nd fret with your middle finger for F, is simply covered by the barre at the 1st fret for Fm. Getting from F to Fm is one finger lifting off the fretboard, not a full hand reshape, the same one-finger relationship that makes Cmaj7 grow out of C or Cadd9 grow out of Cmaj7 in other songs. For a full breakdown of this shape on its own, including why it buzzes and an easier no-barre version, see the Fm chord guide.
The G/B, C/G and Am/E Slash Chords
Three slash chords show up across the song, each one a familiar shape with a different bass note underneath it. A chord written with a slash, like G/B, means play the chord named before the slash while using the note after the slash as the bass note instead of that chord's usual root.
| Chord | 6 | 5 | 4 | 3 | 2 | 1 |
|---|---|---|---|---|---|---|
| G/B | Muted | 2 | 0 | 0 | 0 | 3 |
| C/G | 3 | 3 | 2 | 0 | 1 | 0 |
| Am/E | 0 | 0 | 2 | 2 | 1 | 0 |
For G/B, index finger on the 5th string (A) at the 2nd fret, ring finger on the 1st string (high E) at the 3rd fret, with the 4th, 3rd and 2nd strings left open and the 6th string muted. That bass note is a B, which sits neatly between C (whose lowest note is C) and Am (whose lowest note is A), making it a smooth stepping stone between the two.
For C/G, keep the standard C shape, ring finger on the 5th string at the 3rd fret, middle finger on the 4th string at the 2nd fret, index finger on the 2nd string at the 1st fret, and add the 6th string at the 3rd fret underneath it as the bass note. Fretting that low note with a fourth finger is an awkward stretch for most hands, so many fingerstyle players instead wrap their thumb over the top of the neck to fret the 6th string, leaving the ring, middle and index fingers free to hold the familiar C shape exactly as they already know it. If neither version is comfortable yet, muting the 6th string and playing plain C in its place is a fine substitute.
For Am/E, this is Am with one change: instead of muting the 6th string, let it ring open. That open low E is the bass note the slash chord is named for, and every other finger stays exactly where it already sits for a normal Am.
The Bass Line Underneath the Chords
Play just the lowest note of each chord in the intro's opening phrase, Am to C to F to C to G/B, and you get A, C, F, C, B. That last step, C down to B, is exactly why G/B exists instead of a plain G: it lets the bass note step down one note at a time on its way back to Am's A, rather than jumping. The same logic explains Am/E and C/G. Am/E puts an E under the Am chord, a note that sits a perfect fourth below A and connects smoothly to the E chord that follows it in the chorus. C/G puts a G under the C chord, tying the bass line to the G chord nearby without a large jump.
None of this changes which chord you're fretting; a G/B is still fundamentally a G chord, just as a C/G is still a C. What changes is only the single lowest note, and that's enough to turn a sequence of separate chord hits into something that sounds like a continuous, gently moving bass line running underneath the melody, which is a large part of why six chord shapes produce a fuller sound than six chord shapes might suggest on paper.
The Picking Pattern
The whole song is fingerpicked, never strummed. Your thumb anchors on whichever bass string carries the chord's root, or the slash chord's bass note, and plays that note on the strong beats, while your index, middle and ring fingers pick through the 3rd, 2nd and 1st strings in a steady, rolling order underneath it. This is the same basic Travis-picking approach found in a lot of slow, fingerpicked singer-songwriter material: an independent thumb keeping time on the bottom while the fingers fill in a softer pattern on top.
Nothing about the pattern itself changes when the chord does. You're playing the same right-hand motion over a new left-hand shape each time, which is exactly what makes a song built from this many different chords manageable. Before worrying about any of the chord changes covered above, practice the picking pattern alone on a single held Am chord until your thumb and fingers stop needing to think about which string is next.
Keep your picking hand's motion small and close to the strings rather than plucking with a big, exaggerated stroke. This song sits at a slow tempo and a quiet dynamic on the original recording, and a heavy-handed pick attack will fight against that rather than support it.
The Intro, Start to Finish
Here's the intro with every chord in order, capo on the 5th fret.
Intro Am - C - F - C - G/B Am - C - G Am - C - E - Am - G - F - Fm - C/G
Play through this slowly with a metronome before matching the recording's actual tempo. Notice that the progression keeps circling back to Am, never staying away from it for more than a few chords at a time, which is part of why the intro is learnable even though it uses nine different shapes: you're really always just one or two chords away from home. That constant return to Am is also the reason it's worth over-learning that one shape before anything else in this post. It's the chord your fretting hand needs to find fastest and most reliably, since every phrase eventually routes back through it.
The Verse, Start to Finish
The verse pares the same chord family down to a shorter, repeating cycle.
Verse C - Am - F - Am - G
This five-chord cycle repeats for each verse line. Some transcriptions swap in the slash-chord versions, C/G and Am/E, in place of plain C and Am here, for a smoother, stepwise bass line underneath the same chords. Both versions are correct and interchangeable. The slash-chord version sounds slightly fuller; the plain version is easier to keep steady while you're still learning the song.
Notice how little actually moves between C, Am and F in this cycle. C to Am shifts the ring finger over by one string while the index and middle fingers barely travel, and Am to F is the biggest jump in the cycle, but even there the index finger is already sitting close to where the barre needs to land. Thinking of the verse as one hand shape adjusting slightly, rather than four separate chords, is usually the fastest way to get it moving cleanly under the picking pattern.
The Chorus, Start to Finish
The chorus is the longest section, reusing the intro's chord family with one new addition.
Chorus Am - C - F - C - G/B Am - C - G Am - C - E - Am G - F - Fm - C
The final four chords, G to F to Fm to C, are the section most players slow down for. F to Fm is a one-finger change, covered above, but F to Fm to C in quick succession means one barre chord, a near-identical barre chord, then letting go of the barre entirely for an open shape, all inside a couple of beats. Isolate just those three chords and loop them slowly before trying to play the full chorus at tempo.
Why There's a Major Chord in a Minor-Key Song
Every chord in this song grows out of the Am or C family except one: E. That's worth pausing on, because a minor-key song built almost entirely from Am and its relatives wouldn't normally include a major chord built on the 5th degree above the root, and yet E shows up right before the progression resolves back to Am each time.
Without the capo, this song sits in D minor. The natural minor scale built on D uses a flat 7th, C natural, which would put a minor chord, not a major one, on the 5th degree. But songwriters very commonly borrow the raised 7th from the harmonic minor scale specifically to build a major chord on that 5th degree, because a major chord resolving down to a minor tonic creates a much stronger pull than a minor one does. That borrowed, raised-7th version of the 5th-degree chord is exactly what the E shape becomes once the capo transposes it: a major chord functioning as the dominant of the song's true minor key, which is why it always leads straight back to Am rather than sitting anywhere else in the progression.
Fm works on a similar borrowing principle, though from a different direction. F, the shape it's built from, is the chord most closely related to Am, sharing two of its three notes. Fm darkens that same chord by flattening its 3rd, a small chromatic move that briefly clouds the harmony right before the progression lands back on the open, consonant C at the end of the chorus. It's the kind of one-chord shift that costs very little in terms of new fingering, since it's the same shape as F with one finger lifted, but does a lot of emotional work in the progression, which is a large part of why it's worth getting the F-to-Fm change clean rather than treating it as an optional flourish.
Why It's Not Working
If you have every shape down individually but the song still isn't sitting right, it's almost always one of these.
Fm Buzzes on the 3rd String
Because Fm covers the 3rd string with the barre instead of a dedicated finger, that string is the first to go dead if your index finger isn't pressing evenly all the way across. Check that your barre finger is rolled slightly onto its side rather than flat, which concentrates pressure along the edge of the finger instead of spreading it thin across the pad, and confirm the 3rd string rings clean on its own before playing the full chord.
F to Fm Sounds Like Nothing Changed
If lifting your middle finger off the 3rd string doesn't produce an audible shift, the barre underneath likely wasn't pressing that string firmly enough to begin with, so the note was already muted before your middle finger lifted. Fret F, pluck the 3rd string alone, and confirm you hear a clear 2nd-fret pitch before comparing it to the muted, barred version in Fm.
The Slash Chords Sound Like Plain Chords
G/B, C/G and Am/E only do their job if the bass note is actually ringing. If your fretting finger on that bass string, or your thumb in the case of C/G's thumb-wrap version, isn't pressing firmly and close to the fret wire, the open or muted string underneath bleeds through instead and the slash chord ends up sounding identical to its plain counterpart. Pluck the bass note by itself and listen for a clean, distinct pitch before playing the full chord.
The Picking Pattern Falls Apart on a Chord Change
This is the most common problem with any fingerpicked song, not just this one. Players who can hold the pattern steady on a single chord often lose it entirely the instant their fretting hand needs to move to the next shape. Practice changing chords with your picking hand still moving through the pattern, even sloppily, instead of pausing your right hand while your left hand repositions. Slow everything down with a metronome until both hands can move together without either one stopping.
The Capo Is Muting Strings Near the Nut
A capo placed too far from the fret, or clamped down at an angle, can deaden strings or throw chords slightly out of tune, especially higher up the neck like the 5th fret. Position the capo just behind the fret wire, as close to it as the string allows without sitting on top of the fret itself, and check that all six strings ring clean and stay in tune after you clamp it down.
Strings You Aren't Picking Are Ringing Anyway
Because the picking pattern only plays four or five of the six strings on most chords, any string left out needs to actually stay silent, not just unpicked. A 6th string that isn't properly muted on Am or C, for instance, can still ring sympathetically or catch the edge of a finger mid-pattern and add an unwanted low note underneath the chord. Rest the side of your picking-hand thumb lightly against any string that isn't part of the current chord, a small habit that costs nothing in terms of new technique and cleans up a surprising amount of unwanted noise.
The Am Doesn't Ring Clean
Am's ring finger on the 3rd string is close enough to the 2nd string that it's easy for it to lean over and mute the string next to it without realizing. Arch your fingers so only the tips make contact with the fretboard, and pluck the 2nd string by itself to confirm it's still ringing open and clear.
Common Mistakes That Aren't About the Chords
Some of what makes this song sound off has nothing to do with any single shape and everything to do with habits around dynamics, tension and picking-hand position.
Playing It Too Loud or Too Aggressively
The original recording is quiet and intimate, close to a whisper in both the vocal and the guitar. A picking pattern played with a heavy, forceful attack fights against that character even if every chord and every beat is technically correct. Practice playing the pattern noticeably softer than feels natural at first, letting the thumb's bass notes sit under the melody rather than driving it.
Letting Fretting-Hand Tension Build Up During Fm
The barre in Fm is the most likely spot for tension to creep in, since it's the shape that asks the most from your hand. Check periodically that your thumb isn't clamping down hard on the back of the neck and that your barre finger is pressing only as hard as needed for a clean chord, no harder. Excess tension tires the hand out faster and makes the F-to-Fm-to-C sequence slower and less accurate, not more secure.
Picking Too Close to the Bridge
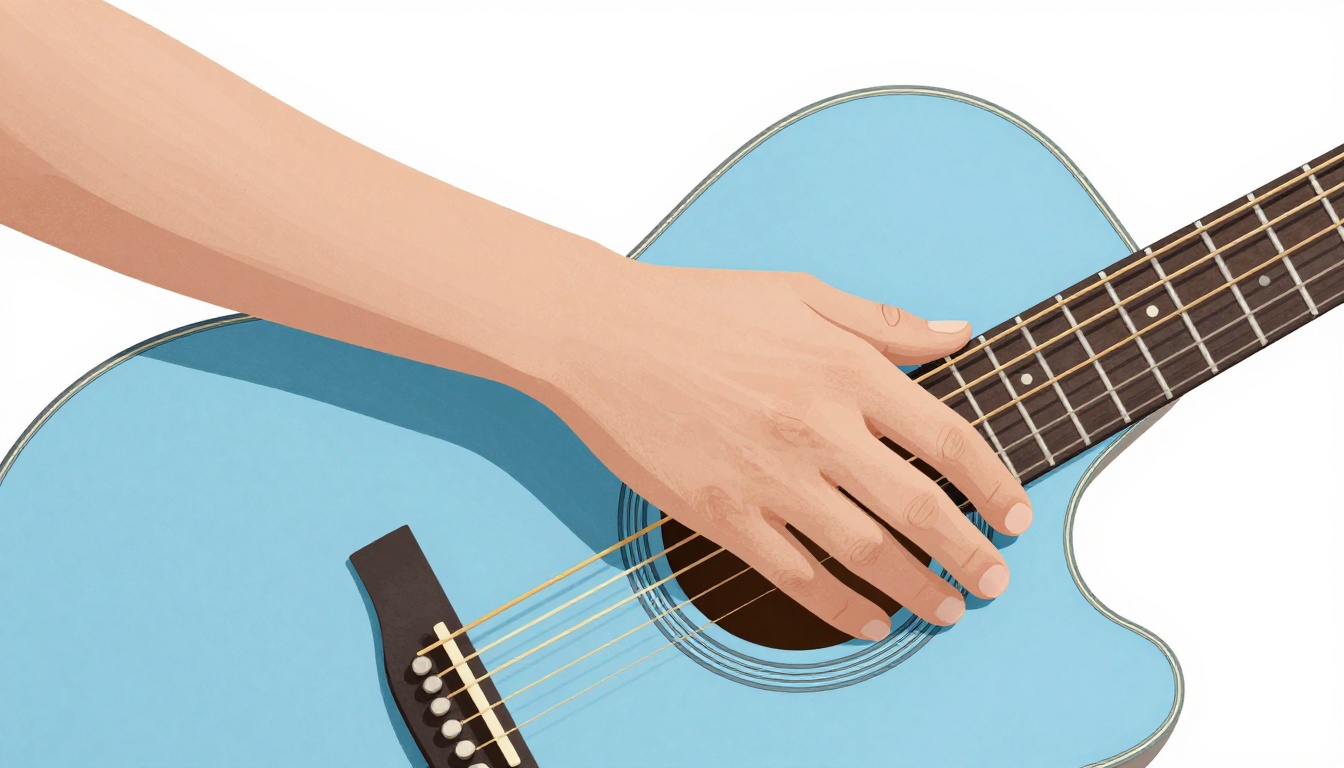
Where your picking hand sits along the strings changes the tone significantly on a fingerpicked part like this one. Picking too close to the bridge produces a thin, brittle sound that works against the song's warm, hushed character. Picking closer to the sound hole, roughly where a strumming hand would naturally rest, gives a fuller, rounder tone that suits the arrangement better.
Rushing the Slower Sections
Because the whole song sits at a slow, steady tempo, it's tempting to speed up slightly during the easier chord stretches, Am and C especially, and then slow back down for Fm or the slash chords. Play along with a metronome click on every beat, not just occasionally to check yourself, until the tempo stays constant regardless of which chord your fretting hand is dealing with underneath it.
Stopping Completely When a Change Goes Wrong
A missed change during practice is normal, especially around F to Fm to C, where there's no natural pause to recover in. Stopping entirely to fix a mistake trains your hands to expect an interruption every time that sequence comes up, which slows down learning the song as a whole. Keep the pattern moving even through an imperfect change, and let the next pass through the progression be where the correction actually happens.
Easier Versions and Where You Can Simplify
None of these are lesser ways to play the song. They land on the same chords and the same harmony, with fewer moving parts.
For Fm, if the barre isn't solid yet, dropping to a plain F for that one beat is a reasonable stand-in while the barre develops, since the difference between the two chords is genuinely small in context.
For the slash chords, plain Am, C and G in their place work throughout the song. You lose some of the smoother, stepwise bass line the slash-chord bass notes provide, but every chord change still lands correctly and the song remains fully recognizable.
For the picking pattern, a simple steady strum, or a slow, muted thumb-brush across the strings, works over the same chord progressions covered above while your fingerpicking technique develops. Get the chord changes solid in tempo first, then layer the fingerpicking pattern back in once your fretting hand isn't the bottleneck.
Playing It Without a Capo
If you don't own a capo, the same song is playable as full barre chords with no capo at all, just transposed up by five semitones. Every Am shape becomes Dm, every C becomes F, every F becomes Bb, every G becomes C, every E becomes A, and every Fm becomes Bbm.
| With capo (5th fret) | Without capo |
|---|---|
| Am | Dm |
| C | F |
| F | Bb |
| G | C |
| E | A |
| Fm | Bbm |
This version is considerably more demanding on the fretting hand, since Bb and Bbm both require full barre chords with no open strings to lean on, where the capo version gives you several easy open shapes. Two of the six chords are less work than they first appear, though: Dm and A are both plain open chords, no barre needed at all.
| String | Fret (Dm) | Fret (A) |
|---|---|---|
| 6 (low E) | Muted | Muted |
| 5 (A) | Muted | Open |
| 4 (D) | Open | 2 |
| 3 (G) | 2 | 2 |
| 2 (B) | 3 | 2 |
| 1 (high E) | 1 | Open |
For Dm, index finger on the 1st string at the 1st fret, middle finger on the 3rd string at the 2nd fret, ring finger on the 2nd string at the 3rd fret. For A, index, middle and ring fingers each take one of the 4th, 3rd and 2nd strings at the 2nd fret, a tight three-finger cluster that most players find awkward for the first few weeks before it settles in.
Bb and Bbm are the two genuinely harder shapes in this version, both full barre chords built around the same root, one fret up from the open A and Am shapes.
| String | Fret (Bb) | Fret (Bbm) |
|---|---|---|
| 6 (low E) | Muted | Muted |
| 5 (A) | 1 (barre) | 1 (barre) |
| 4 (D) | 3 | 3 |
| 3 (G) | 3 | 3 |
| 2 (B) | 3 | 2 |
| 1 (high E) | 1 (barre) | 1 (barre) |
For Bb, index finger barres the 5th and 1st strings at the 1st fret while your ring, middle and pinky fingers cover the 4th, 3rd and 2nd strings at the 3rd fret. For Bbm, that same barre holds, but only the 4th and 3rd strings sit at the 3rd fret, with your middle finger moving the 2nd string back to the 2nd fret, which is the same one-finger relationship between F and Fm covered earlier in this post, just built on a different string set. Unless you have a specific reason to skip the capo, the version earlier in this post remains the more approachable way to learn the song, since it trades two demanding barre chords for open shapes you likely already know. The guitar capo chart covers this kind of shape-to-sounding-chord transposition in more detail if you want to apply the same logic elsewhere.
Reading This Song's Chord Chart
If you're working from a printed or online chart rather than this post, a couple of notation habits are worth knowing so nothing catches you off guard. A chord written with a slash, like G/B or C/G, means play the chord named before the slash while using the note named after the slash as the bass note instead of that chord's usual root. It isn't a separate chord layered on top; it's the same chord with a different note underneath it.
A capo instruction is usually written as "Capo 5" or "Capo V" near the top of the chart, sometimes with a note that the chords shown are "as played," meaning the shapes to form under your fingers, not the pitches that actually come out once the capo is on. If a chart instead lists the sounding chords, Dm, F, Bb, C, A and Bbm, without mentioning a capo at all, that's the same song viewed from the other side of the same transposition covered above.
Where charts disagree, and they do on this song, most commonly on whether the bridge uses G/B or a plain G, and on whether the verse uses the slash-chord or plain versions of C and Am, that's normal. Different transcribers hear a quiet, sparsely recorded acoustic part slightly differently, and every version covered in this post sits correctly under the song regardless of which small variation a given chart chose.
Changing Between Chords Is the Real Skill
Every shape in this post, on its own, is something a player with a modest amount of open-chord experience and a working barre can already form. What actually determines whether this song sounds right is whether your fretting hand can move between those shapes while your picking hand keeps the thumb-and-fingers pattern going underneath it without stalling. Treat the individual chords as the easy part and the movement between them, especially around F, Fm and the slash chords, as the thing worth most of your practice time.
Practice Routine
Fifteen minutes is enough to make real progress on this song if it's spent with intent rather than running the whole thing from the top every time.
Spend the first five minutes on the picking pattern alone, on a single held Am chord, focusing only on your thumb and fingers moving independently and evenly. Spend the next five minutes isolating the G to F to Fm to C change from the end of the chorus, slowly, without worrying yet about keeping the picking pattern smooth through it. Spend the final five minutes combining both on just the first line of the intro. Only once that's solid should you attempt the full intro at tempo, and it's fine to stay well under the recording's speed while your hands are still finding their footing.
What the Song Is About
Ben Gibbard has said the song grew out of thinking about death and the afterlife around his twenty-ninth birthday, despite not having experienced a major personal loss at that point in his life. The idea he described chasing was direct: what happens to two people who loved each other once one of them is gone, stripped of any specific religious framework for an answer. That plainness carries over into how the song is built musically as much as lyrically. There's no key change, no unusual chord borrowed from outside the small Am-and-C family covered in this post, and no ornate voicing anywhere in it. A promise stated as simply as the title line benefits from music that doesn't get in its way, which is very likely why Gibbard never dressed the arrangement up beyond one guitar and one voice, even once it reached the studio.
Where This Song Came From
Ben Gibbard wrote and performed "I Will Follow You Into The Dark" as a solo acoustic piece for Death Cab for Cutie's 2005 album Plans.
The recording itself happened almost by accident. During a break in sessions at Long View Farm studio in Massachusetts in spring 2005, while the band was waiting on a technical issue elsewhere in the room, Gibbard started playing the song on his own. Producer Chris Walla captured that take with a single microphone in mono, and the version that made the album is essentially that raw take, audible breathing included, rather than a re-recorded, polished version.
Released as the album's third single in July 2006, it peaked modestly, reaching number 28 on the Modern Rock Tracks chart and missing the Billboard Hot 100 entirely. Its afterlife told a different story. The song has since been certified double platinum in the US, platinum in Canada, gold in New Zealand and silver in the UK, and it's become Death Cab for Cutie's best-selling single by a wide margin, well beyond what its modest initial chart run would have predicted.
Television and film placements did a lot of that slow-burn work. The song has soundtracked scenes in Grey's Anatomy, Scrubs, 90210 and the films The Invisible, Friends with Benefits and Crazy, Stupid, Love, among others, and it's been covered by a number of other artists in the years since. A quiet, three-minute solo acoustic take recorded during a studio break, in other words, ended up outlasting and outselling most of the more polished, full-band material on the same album.
Playing It on Electric or Nylon-String Guitar
The recording is a solo acoustic guitar part, but every chord shape in this post works identically on an electric or nylon-string classical guitar. What changes is feel, not fingering. A nylon-string guitar's wider neck can make the barre chords, F and Fm especially, feel a bit more spread out under your hand at first, though the shapes themselves don't change. An electric guitar played clean, with light reverb, is a reasonable way to approximate the recording's quiet, intimate character, though electric strings respond more sensitively to picking-hand dynamics than acoustic strings, so a pattern that sounds even on acoustic can sound uneven on electric until your touch settles.
Singing and Playing at the Same Time
Once the chords and the picking pattern are each solid on their own, singing while playing is usually the next hurdle, mainly because the vocal melody doesn't line up rhythmically with the picking pattern the way it would over a simple strum. Get the guitar part running close to automatically first, so your picking hand keeps the pattern going even when your attention shifts to the vocal. Then learn the melody on its own, without the guitar, until you know exactly where each line falls against a steady beat. Combining both is then a matter of doing each slowly together and building tempo back up gradually, rather than trying to learn both at once from a standing start.
The vocal on the original recording sits quietly, almost conversationally, over the guitar rather than pushing to be heard above it, which is worth keeping in mind if you're working out your own phrasing. There's no need to project the way you might over a full-band arrangement. The guitar part in this post was built to sit under a voice at that same restrained volume, and pushing your own singing louder than that tends to fight the accompaniment rather than sit with it.
How Long It Takes to Learn This Song
For a player who already has some fingerpicking experience and a working barre chord, a clean run-through of the intro and verse is realistic within one to two weeks of short daily practice. None of the individual shapes are unusual. What takes the time is keeping the picking pattern moving through the chord changes, especially the F-to-Fm-to-open-chord sequence in the chorus.
For a newer player still building barre-chord strength, expect the timeline to stretch closer to four to six weeks, with Fm as the likely bottleneck rather than any of the open shapes. The simplified version covered above, using F in place of Fm and a slow strum instead of the picking pattern, is worth using in the meantime so you're playing the whole song well before every individual technique has fully caught up.
Building Up to Tempo
The recording moves unhurriedly, but trying to match even a slow tempo before the picking pattern and the chord changes are each individually solid is the most common way players stall out on this song. Set a metronome well below the recording's actual speed, slow enough that you can play the picking pattern cleanly through at least one full verse without a single dropped note or muted string, and stay at that tempo for several days before increasing it.
Raise the metronome in small steps, five beats per minute at a time, and only move up once the current tempo has stayed clean across several passes in a row, not just one. The F-to-Fm-to-C sequence at the end of the chorus is usually the part that exposes a tempo increase that happened too early, since it's the first thing to fall apart under pressure. If that sequence starts buzzing or dragging after a tempo increase, that's the signal to drop back down rather than push through it.
Playing Along With the Recording
Because the original recording sits at a slow, steady tempo throughout, with no sections that speed up or pull back, it's a reasonable song to play along with once your own tempo is close to the record's. Start with just the intro, matching your Am-to-C alternation to what you hear, and use the recording's quiet, even picking as your reference for how restrained the whole thing should sound, rather than for raw speed.
If you're still building up to that tempo, resist the urge to play along at full speed before you're ready. A metronome set to your own practice tempo will teach the picking pattern and the chord changes more reliably than fighting to keep pace with a recording that's faster than your hands currently allow. Save playing along with the actual track for once your slow, metronome-paced version is already clean through the full intro and verse.
Frequently Asked Questions
What capo fret does "I Will Follow You Into The Dark" use?
The 5th fret. With the capo there, the open Am, C, F, G, E and Fm shapes covered in this post produce the song's actual key.
What key is the song in?
Without a capo, the song sounds in D minor, the relative minor of F major. With the capo on the 5th fret, you're fretting the shapes of D minor's relative-position chords, Am and its neighbors, five frets up.
Is this song strummed or fingerpicked?
Fingerpicked throughout, on the original recording and in this post. A thumb plays the bass notes while the fingers pick through the top three strings in a steady, rolling pattern.
What's the hardest chord in the song?
Fm, since it's a full barre chord with no open strings to lean on, and it's approached directly from the nearly identical F chord, which makes the small difference between them easy to fumble at speed.
Can I play this without a capo?
Yes. Every chord shifts up to its barre-chord equivalent: Am becomes Dm, C becomes F, F becomes Bb, G becomes C, E becomes A, and Fm becomes Bbm. It's a harder version of the same song with no open strings to fall back on.
Who wrote "I Will Follow You Into The Dark"?
Ben Gibbard of Death Cab for Cutie wrote and performed it as a solo acoustic piece for the band's 2005 album Plans.
Was the album version a rough take or a finished recording?
Both. Gibbard played it during a break in another session, and producer Chris Walla recorded that take with a single microphone. The version on Plans is essentially that raw take rather than a later, re-recorded version.
Do I need to use all three slash chords, or can I simplify them?
You can simplify. Plain Am, C and G work in place of Am/E, C/G and G/B throughout the song. You'll lose some of the smoother bass-line movement the slash chords provide, but every chord change still lands correctly.
GuitarLowKey
Ready for fifteen focused minutes?
Open the web app and train the change that is blocking your song.