
For Whom the Bell Tolls Guitar Tab: Riff, Chords, and Solo
The power chord shapes for Metallica's For Whom the Bell Tolls, the palm-muted main riff, the bridge, and fixes for muddy or buzzing power chords.

The rhythm guitar part to "For Whom the Bell Tolls" is built almost entirely from two power chords, F#5 and E5, played on the low strings with heavy palm muting. Fret F#5 with your first finger barring the 2nd fret of the low E and A strings and your third and fourth fingers adding the D string, then slide the whole shape down two frets for E5. Alternate between them, muted and down-picked, and you already have the riff that opens the song. Everything else, the full chord set, the bridge, the solo, and why your version of this riff sounds thin instead of tight, is covered section by section below.
"For Whom the Bell Tolls" sits in the key of E minor at a driving 118 beats per minute, in standard tuning, E-A-D-G-B-E low to high. The song famously opens with a bass solo rather than a guitar part, so if you came here expecting to play the intro on guitar, the fix for that confusion is the first section below. After that, everything is guitar: the main riff's power chords, the bridge, Kirk Hammett's E minor solo, and every reason a beginner's version of this riff ends up sounding loose instead of locked in.
Song Basics at a Glance
Here is everything you need before picking up the guitar.
| Detail | Value |
|---|---|
| Key | E minor |
| Tempo | 118 BPM |
| Tuning | Standard, E-A-D-G-B-E |
| Main chords | E5, F#5, G5, A5, B5, C5, F5 |
| Time signature | 4/4 |
| Album | Ride the Lightning (1984) |
| Rhythm guitar | James Hetfield |
| Lead guitar | Kirk Hammett |
Every chord in the song is a power chord, meaning it is built from a root note and its fifth (with the root doubled an octave up), not a full major or minor triad. That is why the song can move through a minor key at speed without your fretting hand needing to change shape, a power chord's fingering stays identical whether the underlying chord is "major" or "minor," you are just sliding the same two- or three-finger shape up and down the neck.
Where the Song's Title Comes From
The title is not Metallica's original phrase. It traces back to the English poet John Donne, who wrote in a 1624 sermon that "never send to know for whom the bell tolls; it tolls for thee," meaning that any person's death touches everyone, since all of humanity is bound together. Ernest Hemingway borrowed the line for his 1940 novel about the Spanish Civil War, and Metallica in turn borrowed Hemingway's title for this song.
The lyrics draw specifically from a passage in Hemingway's novel describing soldiers wiped out during an artillery and air assault on a defended hill position. None of this history changes how you finger a power chord, but it explains why a thrash metal song carries a 400-year-old literary reference in its title, and why the lyrics read more like a battlefield scene than a typical 1980s metal theme.
The Bass Intro You Are Not Meant to Play on Guitar
If you searched for this song's tab expecting to learn the opening you hear on the record, the guitar has nothing to do with it. The song opens with a distorted, wah-drenched bass solo written and played by Cliff Burton, layered from three separate bass tracks, a distorted lead line, a clean bass part, and harmonics, and it predates Metallica entirely. Burton had written the piece before joining the band and had already performed an early version of it at a 1979 battle-of-the-bands show with his earlier group, Agents of Misfortune.
The tolling bell sound that follows the bass intro is not a guitar effect either. Drummer Lars Ulrich struck an anvil with a metal hammer, and that recording was blended with a bell sound taken from a sound-effects reel.
Guitar comes in once the bell fades, with James Hetfield's palm-muted power chord riff. If you are learning this song specifically to play along with a recording or backing track, know that the entire intro belongs to bass and percussion, and your first job on guitar starts at the riff below.
The Main Riff, Chord by Chord
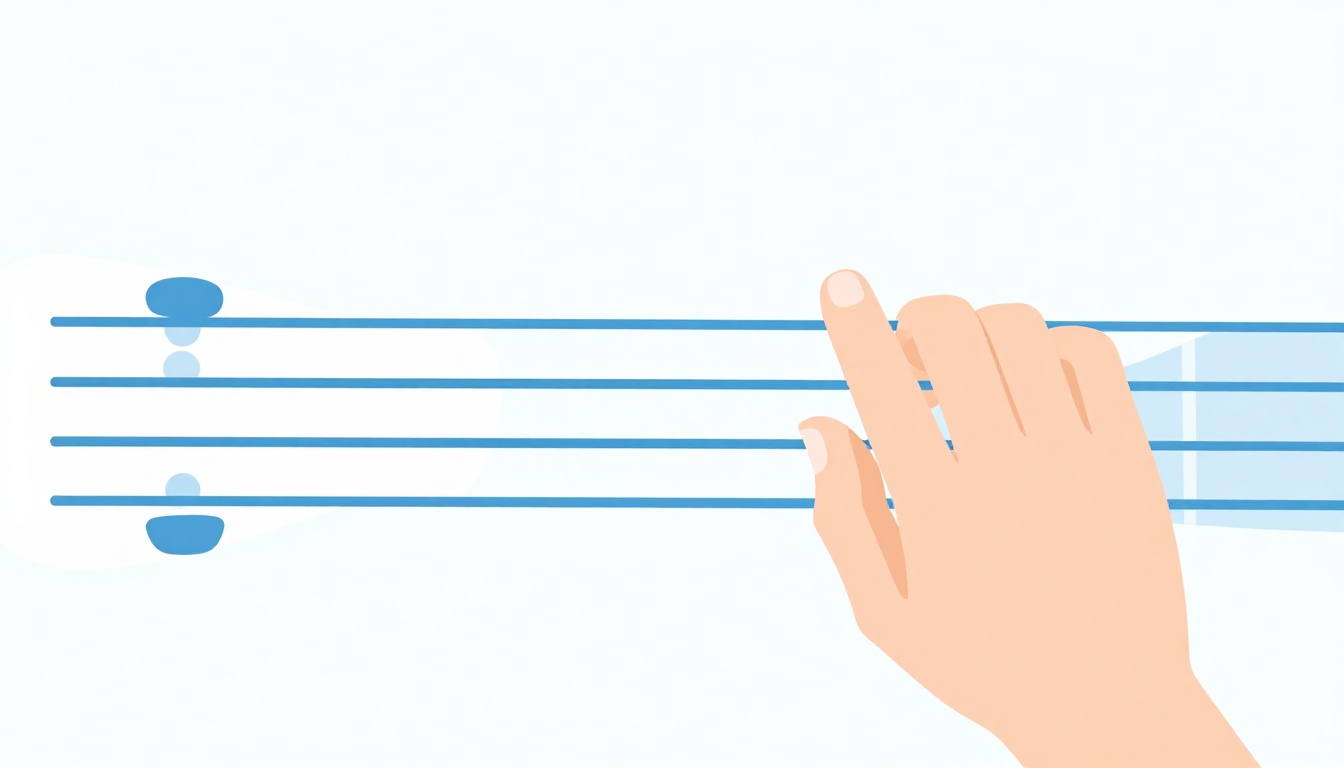
The main riff alternates between two power chords, F#5 and E5, both fretted using the standard "root on the low E string" power chord shape, just moved two frets apart.
| Chord | Root fret (low E string) | Sounds |
|---|---|---|
| F#5 | 2nd fret | The riff's higher chord |
| E5 | Open (0) | The riff's lower, resolving chord |
F#5
| String | Fret | Finger |
|---|---|---|
| 6 (low E) | 2 | 1 |
| 5 (A) | 4 | 3 |
| 4 (D) | 4 | 4 |
| 3 (G) | Muted | - |
| 2 (B) | Muted | - |
| 1 (high E) | Muted | - |
E5
| String | Fret | Finger |
|---|---|---|
| 6 (low E) | Open | - |
| 5 (A) | 2 | 1 |
| 4 (D) | 2 | 2 |
| 3 (G) | Muted | - |
| 2 (B) | Muted | - |
| 1 (high E) | Muted | - |
Both shapes use the same three-string span, low E, A, and D, with your first finger anchoring the root and your other two fingers filling in the fifth and the octave two frets higher. Sliding between F#5 and E5 is a two-fret shift of the entire hand shape, not a re-fingering, which is exactly what makes the riff playable at speed once your hand memorizes the shape rather than the individual fret numbers.
Counting the Riff in 4/4
The song sits in a straightforward 4/4 time signature, four beats per bar, which is worth confirming explicitly because a fast, aggressive riff like this can feel more complicated than it is if you are not counting along. Set a metronome to click on each of the four beats and count out loud, "one, two, three, four," while you play the F#5-to-E5 riff slowly. Notice where each chord change lands relative to the count rather than just reacting to the previous chord.
Most beginners' timing problems with this riff come from rushing between chord changes, arriving at the next chord slightly ahead of the beat, rather than from misunderstanding the rhythm itself. Counting out loud, even after you feel like you know the riff, is a fast way to catch that kind of drift before it becomes a habit.
Full Power Chord Reference for This Song
The riff moves through more than just F#5 and E5 across the verse, bridge, and outro. Every power chord this song uses shares the identical three-string shape, only the root fret changes, so once you have the shape down, the rest of this table is just where to place it.
| Chord | Root fret (low E string) | Notes |
|---|---|---|
| E5 | Open (0) | The tonal center of the song |
| F5 | 1 | Passing chord in the verse |
| F#5 | 2 | Main riff, alternates with E5 |
| G5 | 3 | Verse and bridge |
| A5 | 5 | Verse |
| A#5 (Bb5) | 6 | Chorus-section variation |
| B5 | 7 | Bridge |
| C5 | 8 | Verse |
To play any chord in this table, barre your first finger across the low E and A strings at the listed fret, then add your third and fourth fingers on the D string at the same fret, two strings and two frets away from your first finger's position on the low E string. Every shape in this song is this same three-note power chord moved to a new root fret, nothing more exotic than that.
Getting the Palm Mute Right
Palm muting is the single technique that makes or breaks this riff. Without it, the same power chords sound like an open, ringing rock riff instead of the tight, percussive chug the recording is built on.
Rest the edge of your picking hand's palm lightly across the strings right where they meet the bridge, not further up over the pickups, and pick from underneath that resting point. Too much pressure kills the note entirely and you get a dull thud with no pitch. Too little and the strings ring out almost as if you were not muting at all. The right amount sits in a narrow middle ground: you should still hear the pitch of the chord clearly, just shortened and thickened compared to an open, un-muted strum.
Practicing the Mute in Isolation
Before trying to lock it into the riff's tempo, practice palm muting on a single power chord, E5, at a slow, even down-picking pulse. Listen for consistency between each pick stroke rather than speed. If some notes come out muted and others ring open, your palm is drifting off the strings between strokes rather than staying anchored in one spot.
Why the Low Strings Specifically
Every chord in this song's rhythm part is fretted on the low E, A, and D strings, never higher. That is not a coincidence of this particular riff, palm muting works best on the thicker, lower strings, where the string's own tension and mass give the mute something substantial to dampen. The same muting technique applied to the thin high E and B strings produces a much weaker, less percussive effect, which is part of why heavy rhythm riffs across metal in general tend to live on the low strings while melodic and lead lines move higher up.
Recording Yourself to Check the Mute
Palm muting is one of the hardest techniques to self-assess in real time, because your ear adjusts to whatever you are currently playing. Record a short loop of the F#5-to-E5 riff on your phone and listen back. Inconsistent muting that felt fine while you were playing it often becomes obvious the moment you hear it played back, since you are no longer distracted by the physical sensation of your hand on the strings.
Why Your Power Chords Sound Muddy or Buzzy
If the riff sounds close but not quite right, it is almost always one of these.
Your Barre Finger Is Not Flat Enough
The power chord shape used throughout this song needs your first finger to lie flat across both the low E and A strings at the same fret, not angled onto its tip the way it would be for a single note. A finger that is too upright leaves one of the two strings only half-fretted, which reads as a dead or buzzing note rather than a clean root.
You Are Letting the Open Strings Ring
Every shape in this song deliberately mutes the G, B, and high E strings. If your fretting hand's fingers are not lightly touching those strings to deaden them, or if your picking hand strikes them by accident, you get extra ringing notes that clash with the power chord and read as mud rather than the tight, closed sound the riff needs.
Your Palm Mute Is Too Far From the Bridge
A palm mute applied too far up the strings, closer to the neck pickup, deadens the note almost completely and kills the pitch along with the attack. Move your palm back toward the bridge saddles until the pitch is still audible but shortened.
You Are Picking Too Far From the Bridge
Downpicking closer to the neck produces a rounder, less percussive tone that works against this riff's character. Pick closer to the bridge, near where your palm is resting, for the tighter, more aggressive attack the recording has.
Your Amp Gain Is Compensating for Bad Technique
High-gain distortion smooths over sloppy muting and makes buzz and mud harder to hear while you practice. Practice this riff on a clean or lightly overdriven tone first, where every muting mistake is obvious, then bring the gain back up once the technique is solid.
Why the Riff Uses Chords Outside the Key
Look closely at the full chord list, E5, F5, F#5, G5, A5, A#5, B5, C5, and something stands out: F5 and A#5 (Bb5) are not part of the E natural minor scale that the song is built on. E natural minor is spelled E, F#, G, A, B, C, D, so a plain F and a plain Bb both sit outside it.
| Chord | Scale degree in E minor |
|---|---|
| E5 | i (the tonal center) |
| F#5 | ii, present but altered in normal minor harmony |
| G5 | III |
| A5 | iv |
| B5 | v |
| C5 | VI |
| F5 | Outside the key, a half step above the root |
| A#5 (Bb5) | Outside the key, a tritone from the root |
This is a deliberate and common move in metal songwriting, not a transcription error. Sliding a power chord shape up by a single fret from the root, E5 to F5, or reaching for the tritone, E5 to Bb5, creates a harsh, unresolved tension that the diatonic chords in the key cannot produce on their own. Metal guitarists have leaned on this kind of chromatic, half-step movement for decades specifically because power chords make it easy: since a power chord has no third, it carries no strong "major" or "minor" flavor of its own, so sliding it to a chord outside the key still sounds intentional and heavy rather than simply wrong the way the same move would with full triads.
You do not need to understand this theory to play the riff correctly, the tab and chord tables above are enough on their own. But it explains why a couple of chords in this song do not fit neatly into "the key of E minor" the way the rest do, and it is worth knowing if you ever try to write a similar riff yourself.
The Verse Riff
The verse moves the same power chord shape through E5, G5, E5, C5, and A5, keeping the palm-muted, down-picked feel of the intro riff but covering more ground across the neck.
| Section | Chord 1 | Chord 2 | Chord 3 | Chord 4 | Chord 5 |
|---|---|---|---|---|---|
| Verse | E5 | G5 | E5 | C5 | A5 |
Because E5 sits at the open position and G5 only three frets up, the first jump in the verse is small. The bigger stretch comes moving from E5 up to C5 at the 8th fret, and then back down to A5 at the 5th fret. Treat that as its own small drill: loop E5 to C5 and back a few times on its own, slowly, before trying to play the full verse progression at tempo.
Keeping the Mute Consistent Across a Bigger Jump
The temptation with the E5-to-C5 stretch is to lift your palm off the strings while your fretting hand covers the distance, then reset it once you land on the new chord. That produces a brief gap of unmuted, ringing string noise right at the jump, which stands out against the otherwise tight, controlled riff around it. Keep your palm resting in place through the jump, moving only your fretting hand, so the muting stays continuous even while the chord underneath it changes.
The Bridge Section
The bridge leans on B5, G5, and E5, giving the song a brief harmonic lift before returning to the main riff's territory.
| Section | Chord 1 | Chord 2 | Chord 3 |
|---|---|---|---|
| Bridge | B5 | G5 | E5 |
B5 sits at the 7th fret, considerably further up the neck than the verse and intro chords, so the bridge asks your hand to travel further between changes than anywhere else in the song. Practicing the jump from E5 at the open position up to B5 at the 7th fret in isolation, without worrying about picking pattern or muting yet, is worth doing before adding those back in.
Why the Bridge Feels Like a Release
After several bars of the same low, tight F#5-to-E5 movement, the bridge's jump up to B5 stands out as a genuine change in register rather than just another chord in the sequence. That contrast is deliberate. Moving a riff further up the neck, even using the exact same power chord shape, changes the perceived energy of a passage, higher frets on the same strings carry a brighter, more open quality than the same shape played low near the nut. Recognizing this as an intentional arrangement choice, rather than an arbitrary chord change, can help you play the section with the right dynamic lift instead of treating it identically to the verse that precedes it.
Downpicking vs Alternate Picking for This Song
The main riff and verse are traditionally played with all downstrokes, which is what gives Metallica's rhythm playing from this era its heavy, uniform attack. Downpicking every note at 118 BPM is demanding on the picking hand, especially over a full song, and it is the part of this tab that beginners tend to underestimate compared to the fretting-hand chord shapes.
If straight downpicking at full tempo is out of reach right now, alternate picking, down then up, gets you through the same rhythm at a lower cost to stamina while you build up the strength and control for all-downstroke playing. It will sound slightly less aggressive and uniform than the record, a real but minor tradeoff, and a fully reasonable one while you are still building picking-hand endurance.
A Drill for Downpicking Stamina
Loop just the F#5 to E5 riff for sixty seconds at a slow tempo, all downstrokes, and pay attention to where tension builds in your forearm. Most beginners grip the pick too hard and tense the whole forearm rather than isolating the motion to the wrist. Shake your picking hand out between reps and keep the motion loose and small.
Building Speed Without Losing Control
118 BPM with straight downpicking on every note is a genuine stamina challenge, and the natural temptation is to practice by simply playing the riff over and over at full speed until it improves. That approach tends to reinforce whatever sloppiness is already there rather than fixing it, since your hand is repeating the same imprecise motion each time.
A metronome-based approach works better. Start at a tempo where you can play the F#5-to-E5 riff with completely even muting and picking, even if that tempo feels absurdly slow compared to the record. Increase the metronome by roughly five beats per minute only once the current tempo feels effortless, not just achievable.
| Stage | Tempo | Goal |
|---|---|---|
| 1 | 70 to 80 BPM | Even palm muting, no rushing |
| 2 | 90 to 100 BPM | Consistent downpicking, hand stays relaxed |
| 3 | 105 to 115 BPM | Full riff feels stable, not effortful |
| 4 | 118 BPM | Matches the recording |
Jumping straight to stage 4 and grinding at that tempo usually takes longer to produce a clean result than working up through the earlier stages, because a tense, struggling hand at full speed builds bad muscle memory faster than it builds good technique.
The Guitar Solo
Kirk Hammett's lead break sits over the song's bridge section and draws almost entirely from the E minor scale, played with the aggressive bends and vibrato that define his early Metallica solos. The solo leans on repeated melodic sequences, short phrases played, then shifted up or down the neck and repeated, rather than a single continuous, freely improvised line.
Because the solo stays inside E minor the entire time, the same scale shape that works for the rhythm riff's key also covers the lead. If you already know the E minor pentatonic or full E natural minor scale in the open position and the 12th-fret position, you have the raw material the solo pulls from, even before working out Hammett's exact phrasing note for note.
Bends and Vibrato Are the Hard Part, Not the Notes
Picking the correct scale notes is the easy half of covering this solo. What actually makes it sound right is matching the pitch of Hammett's bends precisely, a half-step bend that lands flat sounds like a mistake, not a stylistic choice, and adding steady, controlled vibrato rather than a wide, uneven wobble. Practice bending up to a target pitch and checking it against a reference note played on an open string or your tuner before worrying about matching the solo's exact timing.
Substituting a Simpler Idea if the Full Solo Is Out of Reach
If matching Hammett's exact phrasing is more than you want to take on right now, you can still play convincingly over the bridge section using the E minor pentatonic scale, alone, in the open position or at the 12th fret. It will not reproduce the recorded solo, but it keeps the harmony correct and gives you something musical to play rather than skipping the section entirely. Add the specific bends and repeated sequences later once the underlying scale feels comfortable under your fingers.
Practicing the Solo Slower Than the Backing Track
Because the solo depends so heavily on precise bend pitches, practicing it at full tempo before your ear and fingers agree on where each bend should land tends to bake in slightly-off intonation that is hard to unlearn later. Slow the backing track down, most tab and lesson sites and many music apps support this, and get each bend landing on pitch at half speed before bringing the tempo back up.
What Actually Makes a Riff Sound Heavy
It is easy to assume that a "heavy" sound comes primarily from distortion or amp gain, and chase tone settings before technique is solid. In practice, palm muting and picking-hand consistency contribute at least as much to a riff sounding heavy as the amount of gain does. A cleanly muted, evenly picked power chord through a moderately driven amp reads as tighter and more aggressive than a loosely muted, uneven riff through a heavily distorted one, because distortion amplifies inconsistency along with everything else.
This matters practically because it means you do not need maximum gain, or any particular amp, to make this riff sound convincing while you are learning it. A cleaner, lower-gain tone actually makes muting mistakes more audible and easier to correct, which is why practicing the technique at a moderate gain setting and saving the heavier tone for once the muting is solid tends to produce a better result faster than the reverse.
Playing an Easier Version for Beginners
If the full riff, verse, bridge, and solo feel like too much at once, strip the song down to its two most recognizable chords, F#5 and E5, and play just the intro riff on a loop. That two-chord riff is genuinely the song's most iconic guitar moment and is entirely learnable in a single practice session once the palm muting is solid.
From there, add the verse's E5-G5-E5-C5-A5 progression next, since it reuses the same power chord shape and only asks for two new root positions, G5 and C5. Save the bridge and the solo for after the rhythm parts are comfortable, since both ask for more neck travel and, in the solo's case, an entirely different technique set built around bending and vibrato rather than muted chugging.
| Skip level | What to play | What to leave out |
|---|---|---|
| Just the riff | F#5 to E5 loop | Verse, bridge, solo |
| Rhythm guitar only | Intro riff plus verse | Bridge, solo |
| Full rhythm part | Intro, verse, and bridge | Solo only |
| Complete cover | Everything, including the solo | Nothing |
Gear on the Original Recording
James Hetfield tracked the rhythm guitar on "Ride the Lightning" with a 1984 Gibson Explorer fitted with Gibson's 496R and 500T humbuckers, run into a Marshall JMP 2203 (the JCM800-era circuit) with an Ibanez Tube Screamer TS-9 pushing extra gain into the front end, through Marshall 1960B cabinets. That Explorer became well known later in the band's career for the "So What" sticker Hetfield put on it, though that sticker was not there yet during this recording.
| Piece of gear | What it was |
|---|---|
| Guitar | 1984 Gibson Explorer, 496R/500T humbuckers |
| Amp | Marshall JMP 2203 |
| Overdrive pedal | Ibanez Tube Screamer TS-9 |
| Cabinet | Marshall 1960B |
None of this gear is required to play the song convincingly. A palm-muted power chord riff translates across almost any guitar and amp combination with enough gain to sustain a chord and enough clarity that individual chugs do not blur into mush, the technique matters far more here than the specific instrument. The Tube Screamer's role is worth understanding even if you never own one: it was not there to add distortion so much as to tighten and push an already-distorted amp signal, which is part of why the original recording's palm-muted notes sound thick without turning into an undefined wall of noise. A modern high-gain amp or amp modeler set to a tight, mid-forward metal tone gets you close without needing to match the exact chain.
A Note on String Gauge and Tone
Heavier strings are often assumed to be the secret to a riff like this, but technique carries far more of the sound than string gauge does. A clean, evenly muted downstroke on lighter strings will sound tighter and more accurate than a sloppy, inconsistent mute on heavier ones. If you already have a guitar set up and playable, there is no need to change string gauge just to attempt this song.
Where string gauge does matter is tuning stability under aggressive palm-muted picking. Very light strings can feel slightly looser and more prone to unwanted overtone ring when they are attacked hard and fast, which can work against the tight, controlled sound this riff wants. If you find your version sounds "flubby" even with correct muting technique, and you are on unusually light strings, that is worth investigating, but it is a secondary factor behind muting consistency and picking-hand position, not the first thing to change.
Playing This Song on Acoustic
This is fundamentally an electric, distorted rhythm part, and an acoustic guitar cannot fully reproduce the sustain and thickness palm-muted power chords get from a driven amp. That said, the chord shapes and the palm-muting technique both translate directly, and practicing the riff on an acoustic is a genuinely useful way to hear muting mistakes that distortion would otherwise hide.
An unplugged acoustic run-through will always sound thinner and more percussive than the record, closer to a rhythmic tapping than the wall of sound the studio version has, and that is expected rather than a sign you are doing something wrong. If your only guitar is acoustic, learning the shapes and the muting technique here transfers completely the moment you do get in front of an electric guitar and an amp with some gain.
Live Versions vs the Studio Recording
Metallica has extended both the bass intro and Kirk Hammett's solo in many live performances over the decades, sometimes considerably, turning what is a tight studio arrangement into a longer showcase for Cliff Burton's successors on bass and for Hammett's improvising. The core rhythm guitar part covered in this post, the F#5-to-E5 main riff, the verse, and the bridge, has stayed essentially unchanged across live versions, which is why learning it from the 1984 studio recording still applies directly to any live version or cover you might play along with.
If you are learning this song specifically to play along with a particular recording, check whether it is the original studio version or a live one before assuming the intro or solo length will match what is covered here. The rhythm guitar sections will line up either way.
Coming From Open Chords: What Actually Changes
If most of your rhythm guitar experience so far has been open chords, strummed on acoustic or clean electric, a few things about this song will feel genuinely different rather than just faster. Open chords generally want to ring out, and a big part of learning them well is getting every string to sound clearly. Power chords in a riff like this want the opposite: controlled, shortened notes that stop almost as soon as they start. Bringing an open-chord mindset of "let it ring" into this riff is one of the fastest ways to end up with a muddy, unfocused sound instead of the tight chug the song calls for.
The other adjustment is hand position. Open chords are usually played with fingers spread across four or five frets and all six strings in play. This riff's power chords use only three strings and a compact two- or three-fret span, which means your fretting hand can stay far more relaxed and closer to the neck than it does for a full open chord. If your hand feels like it is working harder on this riff than it did on open chords, check whether you are unconsciously holding onto old open-chord tension rather than adapting to the smaller, more efficient shape a power chord actually needs.
Why This Song Is a Genuinely Good Power Chord Workout
Plenty of beginner songs use power chords, but few isolate the technique as cleanly as this one does. The entire rhythm part is built from a single moving shape, root note on the low E string, fifth and octave on the A and D strings, which means you are not learning a new chord shape for every chord change the way you would with open chords. You are learning one shape and one skill, palm muting, and applying both across the whole song.
That makes this a useful song to return to even after you have moved past it as a listening favorite. If your palm muting or downpicking stamina ever feels rusty, looping the F#5-to-E5 riff for a few minutes is a fast, focused way to check both without needing a new song's chord shapes to also think about.
A Note for Left-Handed Players
Every string and fret reference in this post assumes a right-handed guitar, fretting hand on the neck, picking hand over the body. If you play a left-handed, reverse-strung guitar, mirror the string numbers in every table here (string 6 becomes string 1 and so on) rather than the fret numbers, which stay the same either way.
Full Song Structure
Seeing the whole arrangement in order helps before attempting a full run-through, since sections repeat rather than looping once through in a simple pattern.
| Order | Section | What is playing |
|---|---|---|
| 1 | Intro | Bass solo and bell, no guitar |
| 2 | Main riff | F#5 to E5, palm-muted |
| 3 | Verse 1 | E5, G5, E5, C5, A5 |
| 4 | Main riff | F#5 to E5 returns |
| 5 | Bridge | B5, G5, E5 |
| 6 | Verse 2 | E5, G5, E5, C5, A5 |
| 7 | Solo | Kirk Hammett, E minor |
| 8 | Main riff and outro | F#5 to E5, building to a final chord |
Not every live performance or reissue follows this exactly, Metallica has extended the bass intro and solo sections in concert over the years, but this is the shape the 1984 studio recording follows.
Changing Between Chords Without Losing the Groove
None of the individual power chord shapes here are physically difficult once your hand knows the three-string span. What actually makes the song feel hard is keeping the palm mute locked in and the downpicking even while your fretting hand slides between root positions, especially on the bigger jumps in the verse and bridge.
Two things help more than anything else:
- Practice each chord-to-chord jump on its own, slowly, before adding tempo. The E5-to-C5 jump in the verse and the E5-to-B5 jump in the bridge are the two biggest stretches in the song and deserve isolated repetition.
- Keep your palm anchored near the bridge through the chord change rather than lifting it off the strings to help your fretting hand move. The muting should stay constant even while the shape underneath it changes position.
A Practice Routine for This Song
Start with the F#5-to-E5 riff alone, slow, until the palm mute sounds consistent on every downstroke. Add the verse's extra chords next, since they reuse the same shape at new fret positions. Only after both of those feel automatic should you add the bridge and, if you are covering the full song, the solo, since both introduce new technical demands on top of what you have already built.
| Days | Focus |
|---|---|
| 1 to 2 | F#5 to E5 main riff, slow tempo, palm muting isolated |
| 3 to 4 | Verse progression added (E5, G5, E5, C5, A5) |
| 5 | Bridge chords added (B5, G5, E5) |
| 6 | Full rhythm part at a reduced tempo, all sections together |
| 7 | Tempo increased toward 118 BPM, solo introduced if covering the full song |
If you are building this into a short daily habit rather than one long session, the homepage has more on structuring focused fifteen-minute practice blocks that actually stick. If tab notation itself, rather than this specific song, is still unfamiliar, how to read guitar tab covers the six-line system and every symbol from the ground up.
Playing Along With the Original Recording
Once the rhythm part feels stable on its own, playing along with the actual studio recording exposes details a metronome cannot. Metallica's rhythm guitar sits doubled and thick in the mix, so your single guitar will naturally sound thinner next to it, which is expected rather than a flaw in your playing. What you are listening for is timing and feel: does your chord change land exactly where Hetfield's does, and does your palm mute have a similar percussive shortness to it.
Start by playing along with just the main riff section, looping that part of the track, before attempting the full song in one pass. Trying to keep up with every section on a first attempt, including the tempo and section changes you have not practiced individually yet, usually produces a worse practice session than isolating one section at a time against the recording.
Common Mistakes Beyond the Chords Themselves
Rushing Toward 118 BPM Too Early
The riff is not difficult to play slowly, and that makes it tempting to push tempo before the palm muting and picking hand are actually solid. A fast, sloppy version of this riff loses the tightness that makes it recognizable far more than a slow, clean version does.
Treating Every Chord Like the Open E5
Because E5 sits at the open, unfretted-root position, some beginners unconsciously relax their muting and fretting pressure whenever the riff returns to it, only to tense back up for the fretted chords. Keep the same hand tension and muting consistency across every chord in the progression, including the open one.
Ignoring the Picking Hand in Favor of the Fretting Hand
It is natural to focus practice time on getting the power chord shapes correct, but on this song the picking hand, specifically the palm mute and the downpicking consistency, is doing more work toward the final sound than the fretting hand is. Split practice time between both rather than assuming the shapes are the hard part.
Skipping the Slow Tempo Because the Shapes Feel Easy
The individual power chord shapes in this song are simple enough that beginners often jump straight to tempo, only to find their muting falls apart the moment they speed up. Spend real time at a reduced tempo with a metronome even if the shapes themselves feel mastered early, since muting consistency, not chord memorization, is what actually degrades under speed.
The Song's Legacy
"For Whom the Bell Tolls" appears on "Ride the Lightning," Metallica's second studio album, released in 1984, and has remained one of the band's most enduring live staples in the decades since. In March 2023, Rolling Stone placed it at number 39 on its list of the 100 Greatest Heavy Metal Songs of All Time. Much of that reputation rests on exactly the elements covered in this post: the unusual bass-and-bell opening, a rhythm riff simple enough to be instantly recognizable, and a solo built from a small set of ideas played with conviction rather than technical excess. None of that legacy changes how you practice the riff, but it explains why this particular song, more than many other thrash tracks from the same era, keeps showing up as a first metal song for guitarists learning power chords.
Frequently Asked Questions
Do I need to learn the bass intro to play this song on guitar?
No. The famous opening is a bass solo written by Cliff Burton, not a guitar part. Guitar enters once the riff starts, after the bell.
What key is "For Whom the Bell Tolls" in?
E minor. Every chord used in the song, E5 through C5, is diatonic to the E natural minor scale.
What tempo should I practice at?
The recording sits at 118 BPM. Start well under that, especially while your palm muting technique is still developing, and increase gradually rather than jumping straight to full speed.
Do I need a special guitar or tuning to play this song?
No. It is standard tuning, E-A-D-G-B-E, and the technique, not the gear, is what makes the riff sound right.
Why does my version sound thin compared to the record?
Almost always inconsistent palm muting, either too light so the chords ring out, or too heavy so the pitch disappears. Isolate the palm mute on a single chord until it sounds even before adding chord changes back in.
Is the solo hard to learn?
The scale material, E minor, is approachable if you already know the shape. What is genuinely difficult is matching Kirk Hammett's bend pitches and vibrato precisely, which takes more repetition than learning the correct notes does.
Can I play this song with alternate picking instead of all downstrokes?
Yes. The original is played with heavy downpicking for its uniform, aggressive attack, but alternate picking gets you through the same rhythm with less strain on your picking hand while you build up downpicking stamina.
Why do some tabs show slightly different chords in the bridge?
Different transcribers sometimes label the same power chord differently, or catch a passing chord that others simplify out. The chords in this post reflect the readings most sources agree on, and small variations will not meaningfully change how the song sounds when you play it.
Where does the song's title come from?
It is borrowed from Ernest Hemingway's 1940 novel of the same name, which itself borrowed the phrase from a 1624 sermon by the poet John Donne. Metallica's lyrics reference a specific battle scene from Hemingway's book.
Do I need a Gibson Explorer or a Marshall amp to sound right?
No. James Hetfield's original recording used a 1984 Gibson Explorer through a Marshall JMP 2203 with a Tube Screamer pushing it, but the palm-muted power chord technique carries the sound far more than any specific guitar or amp. Any guitar and amp combination with enough gain to sustain a chord cleanly will get you close.
Can this song be played on acoustic guitar?
The chord shapes and muting technique transfer directly, but an unplugged acoustic will sound noticeably thinner than the distorted studio recording. It is still a useful way to practice, since acoustic guitar exposes muting inconsistencies that a distorted electric tone can hide.
How long does it take to learn the rhythm guitar part?
The main riff alone is learnable in a single practice session once palm muting is solid. The full rhythm part, including the verse and bridge, is realistic within one to two weeks of short daily practice for someone who already knows basic power chords. The solo, if you choose to learn it, adds meaningfully more time since it depends on precise bends and vibrato rather than memorized shapes.
Is this a good song for a beginner who has never played power chords before?
Yes, arguably one of the best, since the entire rhythm part reuses a single moving shape rather than asking you to learn several unrelated chord shapes. The main challenge is palm muting and picking-hand stamina rather than fretting-hand complexity.
GuitarLowKey
Ready for fifteen focused minutes?
Open the web app and train the change that is blocking your song.